Docker Tutorial for Beginners
2019-10-05
0. Introduction
Last Friday (10.04), I gave a Tech session on Docker to our company’s Tech & DevOps team members about the Docker technology. The session lasts for about an hour, and I have been preparing for all the materials for almost 10 hours.
To be honest, I know nothing about Docker before last Thursday (one day before the session), and my original plan was to give some simple hello-world examples to my colleagues.
However, during the daily standup on Thursday, our CTO asked me “what value are you bringing to the team from the session? If it is just a hello-world project and typing some commands, people are not going to know much about this technology.”
I totally agree with him. The only problem is that, I actually know nothing about Docker at that point, and I’m honestly not sure how deep I can dive into this topic and how well I can present to the whole tech team with members already know a lot about Docker.
This is not an easy task, and I have a limited amount of time to get ready.
Somehow I managed to complete this session quite well (with 10 hours of intensive learning and experimenting and troubleshooting).
I came up with teaching materials and examples, as well as some troubleshooting advice for beginners (based on my own mistakes).
So I will be sharing with you guys all the knowledge of Docker I have at this point. I will be posting a series of Docker tutorials. For this post, it is not just a simple hello-world example; I will also explain how Docker worked internally.
I will share mid-level Docker knowledge (Load Balancing, Swarm, Stack) in my future posts (so stay tuned!).
Hopefully, this tutorial can clarify some beginners’ confusion and provide value to the Docker community.
This tutorial is modified from the docker official website’s orientation project.
1. A bit theory
Before our hands-on activities, let’s get some basic understanding of the Docker technology and some terms we are about to use here.
1. What is Docker?
When people talk about Docker, it actually can be two things. There’s a company called Docker.Inc, it provides Docker Enterprise Service and Support (so companies pay for their service and enterprise-level product).
Docker, the company, supports an open-source community edition of Docker, which is what I’m going to talk about here.
Docker is a tool to help us run applications inside containers, and let’s look at why we need it, and what is the meaning of containers and images.
2. Why do we need Docker?
Imagine you have a company, and your team has developed three different applications. When you try to sell those applications, you need to have a product version of it (which means, you need to have a server running your application).
A server is nothing but just a computer, but it is used for running applications, and it is supposed to keep running 24/7 so that users can access your application.
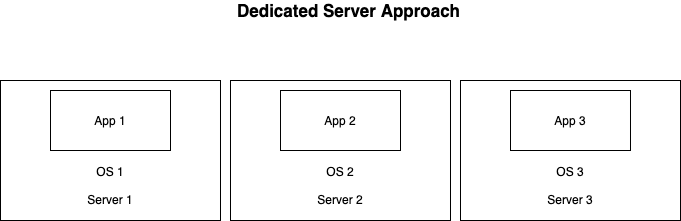
Dedicated Server
People used to host each application in an independent server, so in your case, you need three servers (computers) to host the three applications.
Why? Because you want to make sure that each application has its own running environment, so that they won’t interfere with each other and make your production environment very messy and difficult to control (imagine one of your projects is using python2, and the others are using python3).
But the problem with this dedicated server approach is that, you cannot really predict how much resource each application needs (like disk storage, CPU, RAM…), so sometimes your server is not enough for an application, but sometimes it is just too much for it (so you are wasting the server’s capacity).
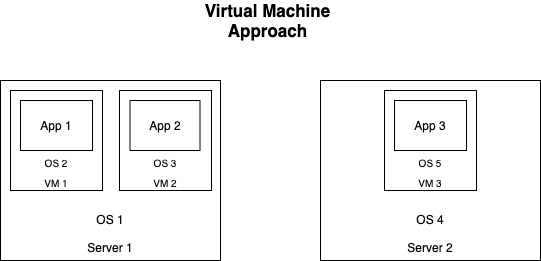
Virtual Machine
Then people start to use virtual machine, which makes it possible to run multiple applications on the same computer, the concept of virtual machine is to create an isolated part of resources from the physical computer and then install any Operation System you like for that application, and thus we achieve the goal of running each application in an isolated environment.
But the problem with the VM solution is that, we need to install OS on each Virtual Machine, so if you want to host 2 applications on one physical machine, you need to create 2 VMs and install 2 OSs(one for each VM), but originally you already have an OS running on the machine, so you end up with a lot of OSs (you might need to consider the fees you need to pay for the extra OSs).
OS takes a lot of disk resources, and you need to start the VM’s OS before running the application(which affects the speed of starting an application).
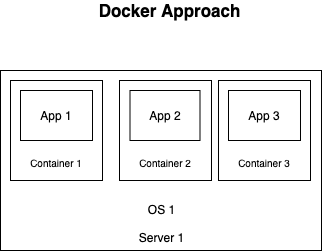
Docker
Then people come up with the Docker solution, which gets rid of the OS on each VM, now we only need one OS on the physical machine, and we will run each application(which is image in the Docker, terminology) in containers.
The Docker approach actually saves a lot of resources (bye, multiple OSs), and applications can start much faster than using VM.
This is just a basic introduction of Docker, but hopefully, you can get a basic idea of why it is so popular nowadays, and how it can be useful for hosting more applications with the same resources.
3. Difference between Containers and Images
Images represent your applications, and Containers are just a space that Docker created for your application to run.
One image can be run on several containers, and by doing this, we can achieve load balancing.
4. Docker Hub
Docker Hub is a website for you to upload your image, and you can also get public images from Docker Hub, similar to GitHub.
2. Environment Setup
Now let’s start to get prepared for our hands-on activities.
This tutorial will use Linux Docker containers.
Before continuing the next section, you need to:
1. Register an account on Docker Hub
https://hub.docker.com/
Note: It is a bit confusing that you need a Docker ID to sign up, actually the
Docker IDis equivalent to your username.
2. Install Docker desktop application
https://www.docker.com/products/docker-desktop
Please note that Docker desktop application only support
Windows EnterpriseandWindows Professionaleditions.
If your OS is Windows Home Edition, and you have no access to any Linux/macOS. You can use an online playground https://labs.play-with-docker.com/
as well, log in with your Docker ID and have fun!
Tips for Windows users
Note: you will need to restart your computer during the installation several times, so please remember to save your work before installation.
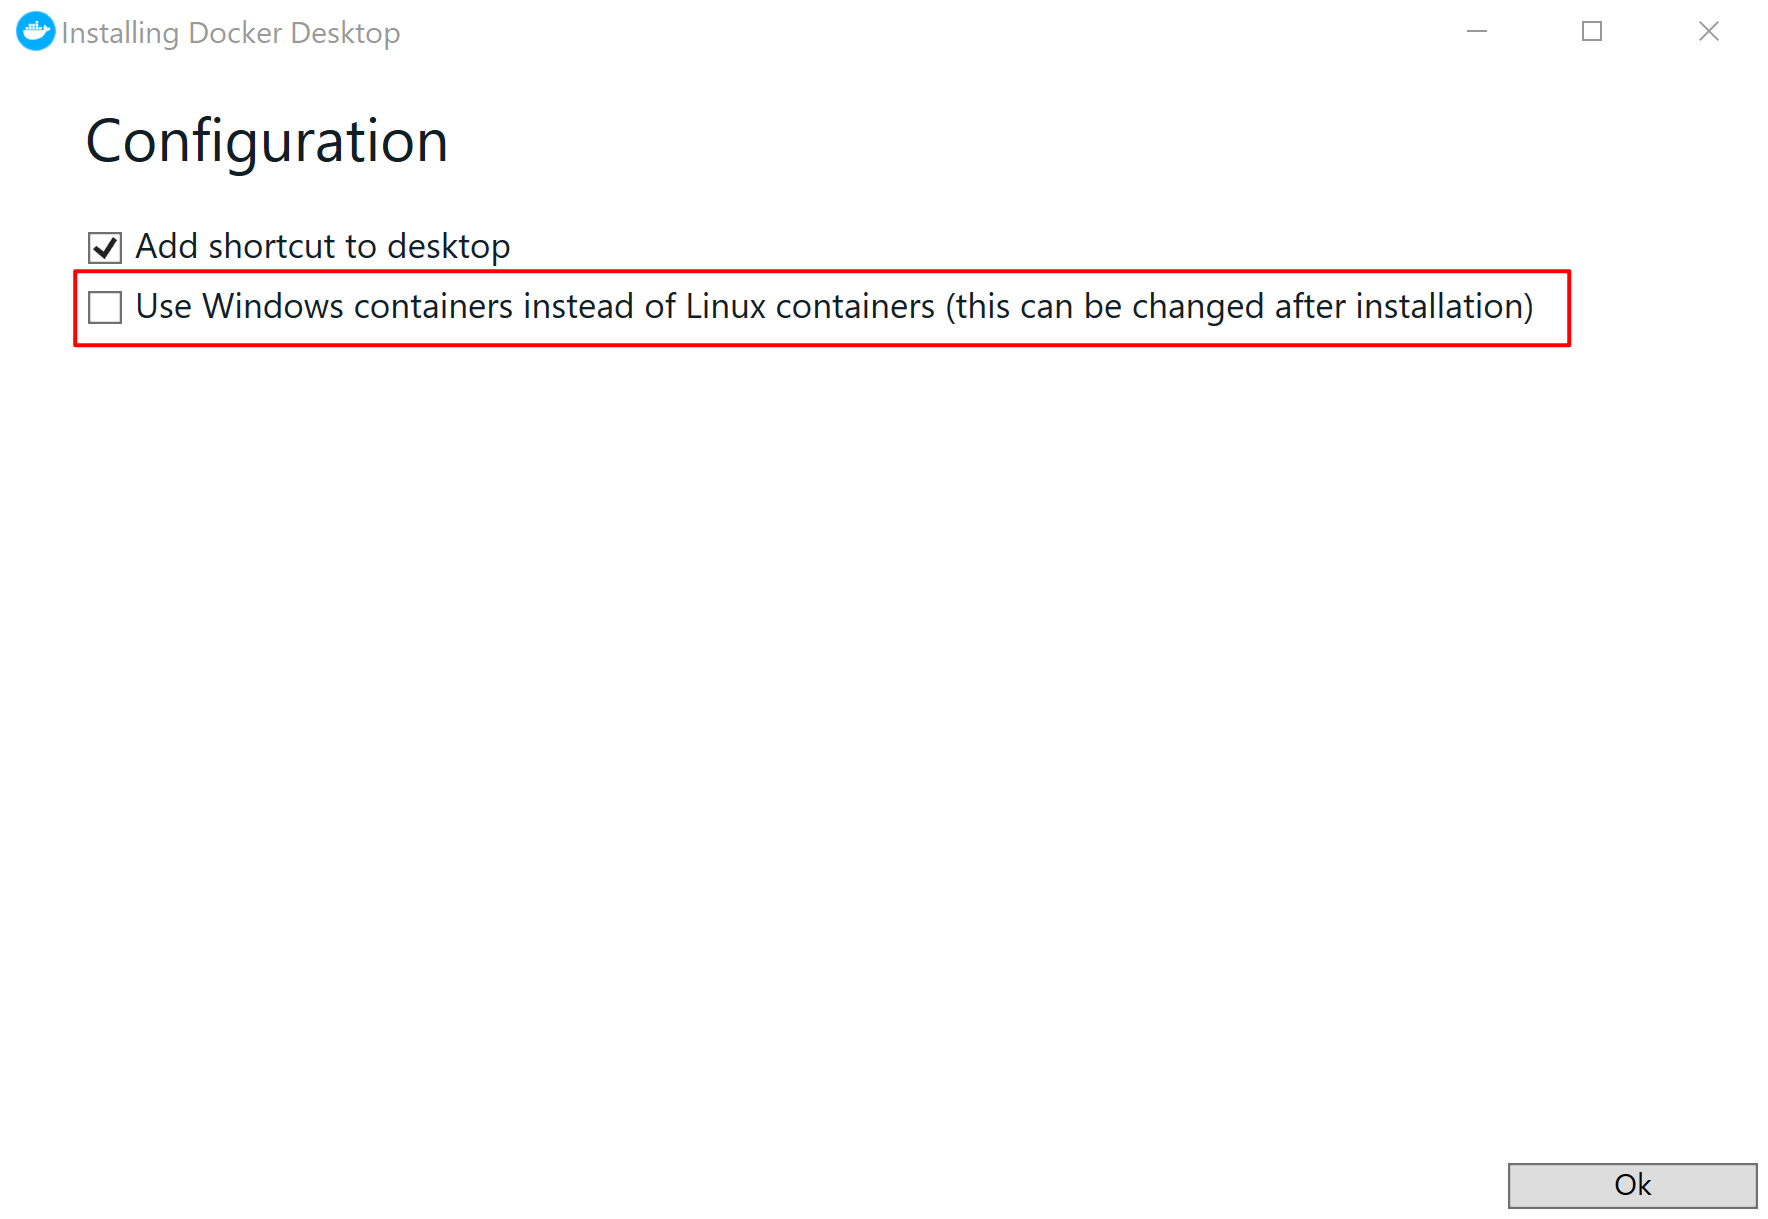
1. Select Linux container
Please select the Linux container option during the installation because this is what we’re going to use here, but you can always switch between windows and Linux later, so it is not a permanent choice.
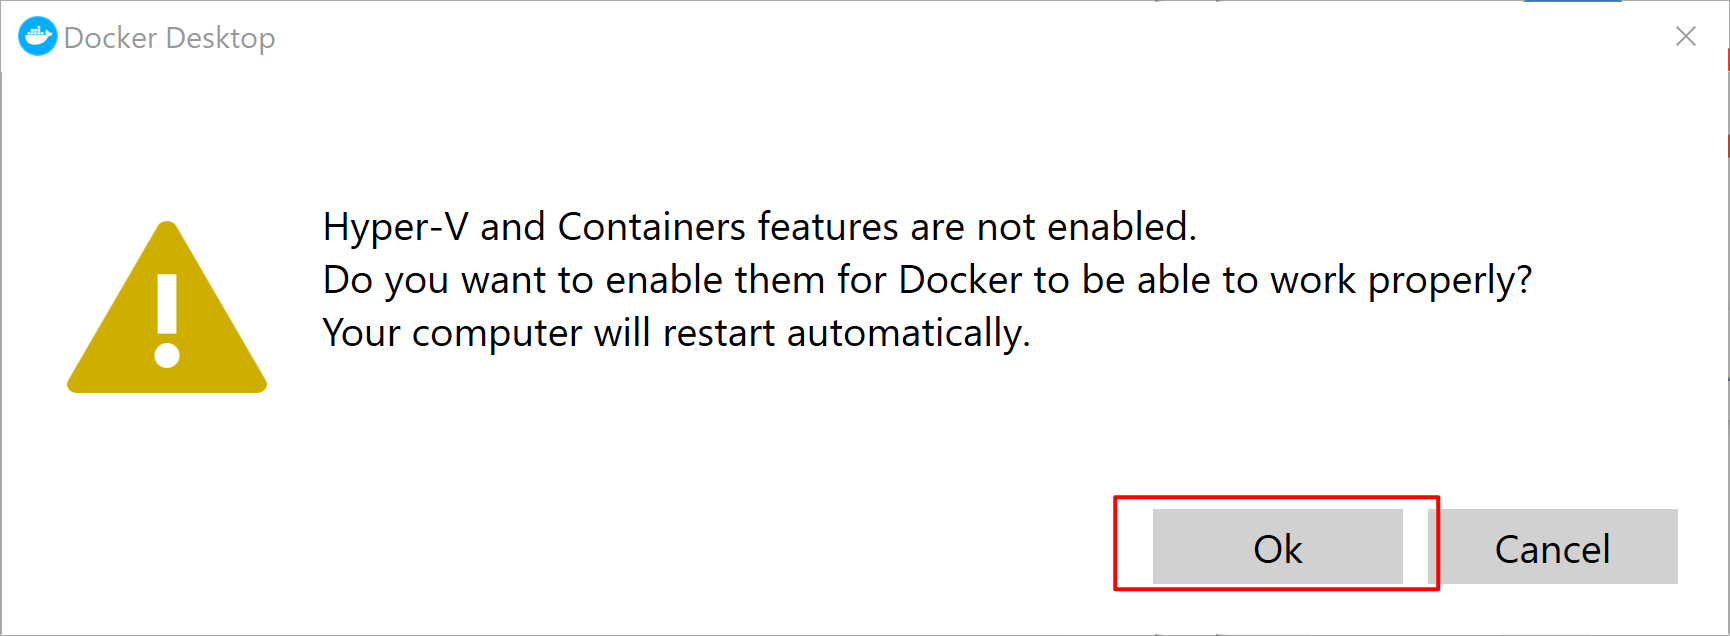
2. Enable Hyper-V
Note: we are not going to use Hyper-V in this tutorial, but we will use it in the future when we cover the topic of Swarm.
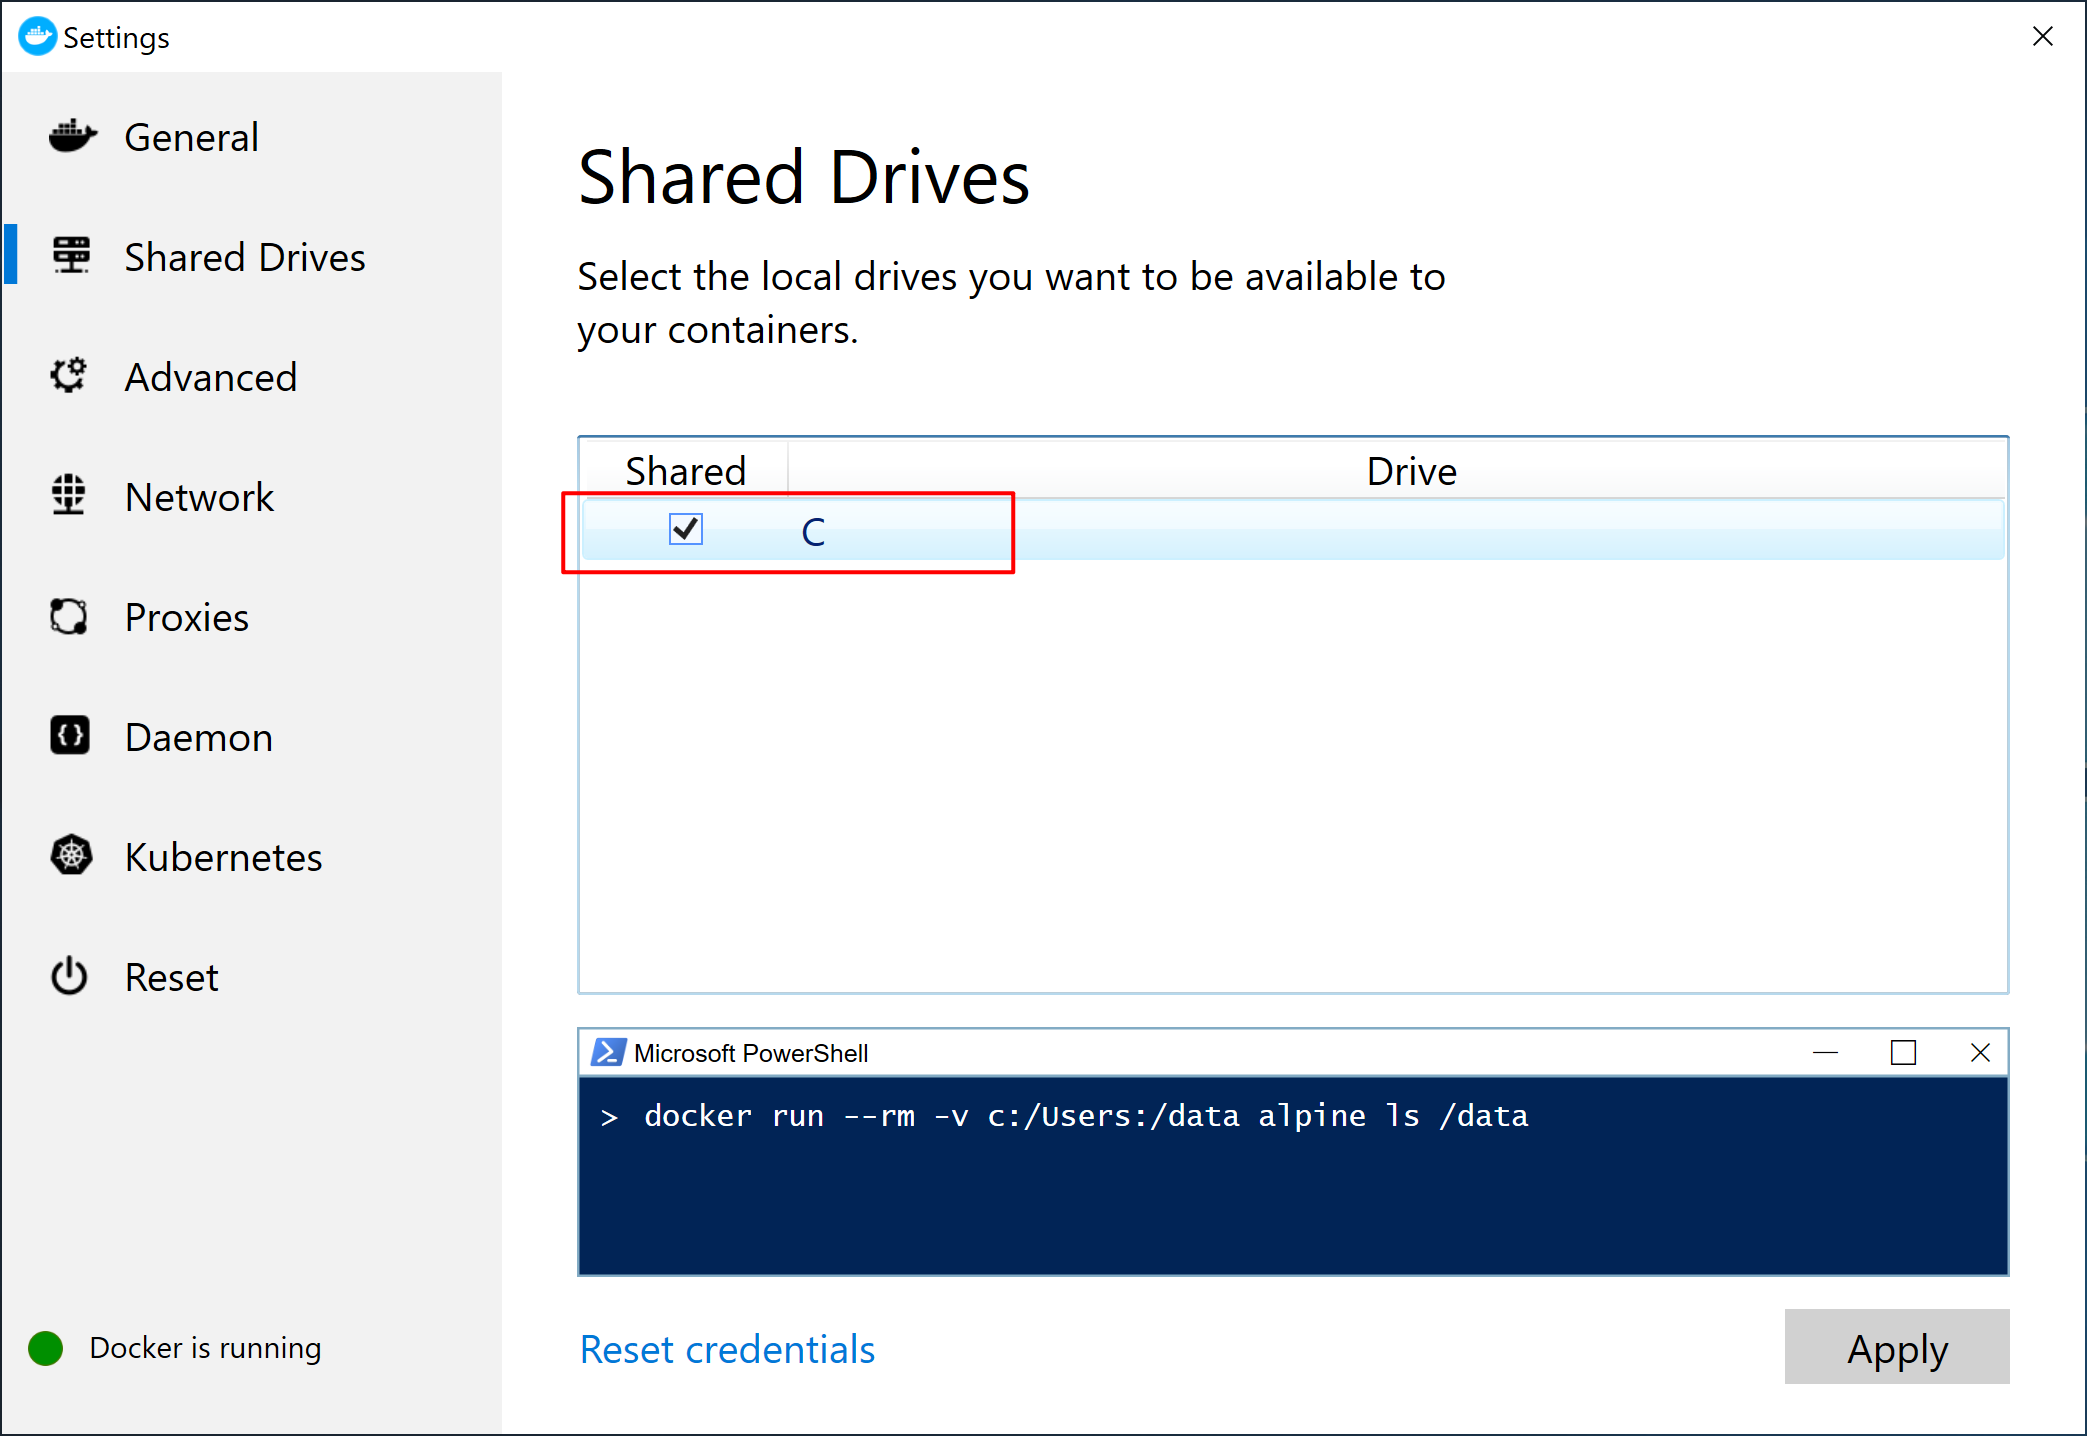
3. Enable Disk Access
Right-click the Docker application icon and go to settings, select Disk, tick the Disk you would like to give Docker access (at least choose one).
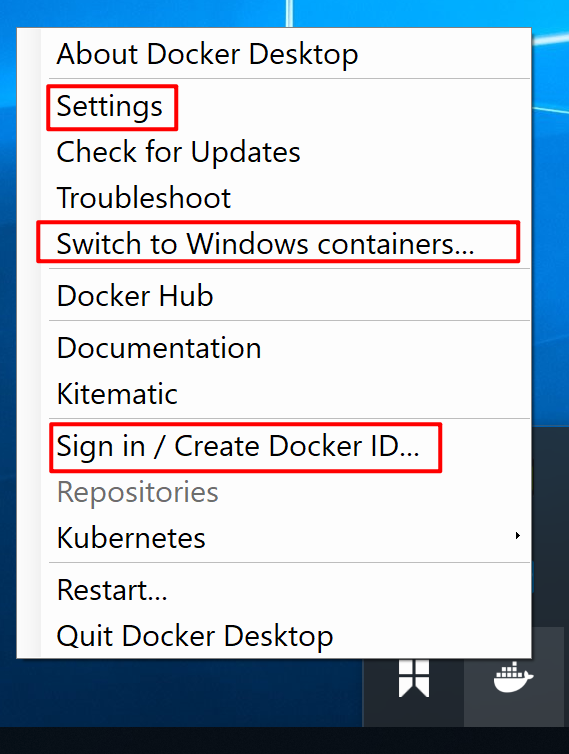
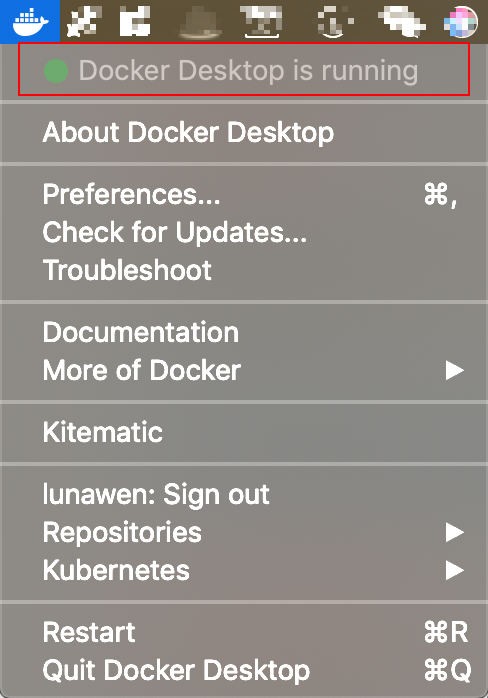
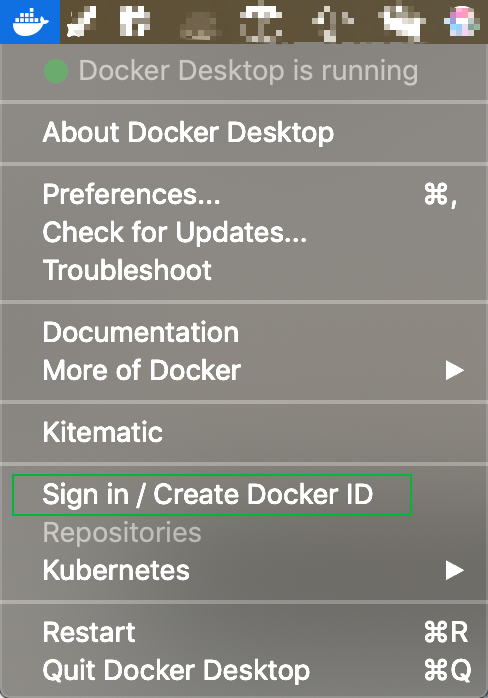
All Users with the desktop application installed
Please right-click the Docker application icon on your taskbar, and sign in with your Docker Hub credentials.
If you are using the online docker playground, you don’t need to sign in because you already signed in with your Docker ID to use the playground.
Note for Windows User: if you can see Switch to Windows containers, you are already in the Linux container mode, so don’t click it.
3. Verify docker command
docker --version

4. This tutorial is going to use a public repo on GitHub, so please have git installed as well.
You can verify with this command:
git --version

You are all set! Let’s move to the next section!
Part 1: Hello-world
In this section, we are going to run our Hello-World project on our terminal.
Make sure:
1. You have an Internet connection.
2. Your Docker Desktop application is running.
Open your terminal, and type the following command:
docker run hello-world
You will see something like this:
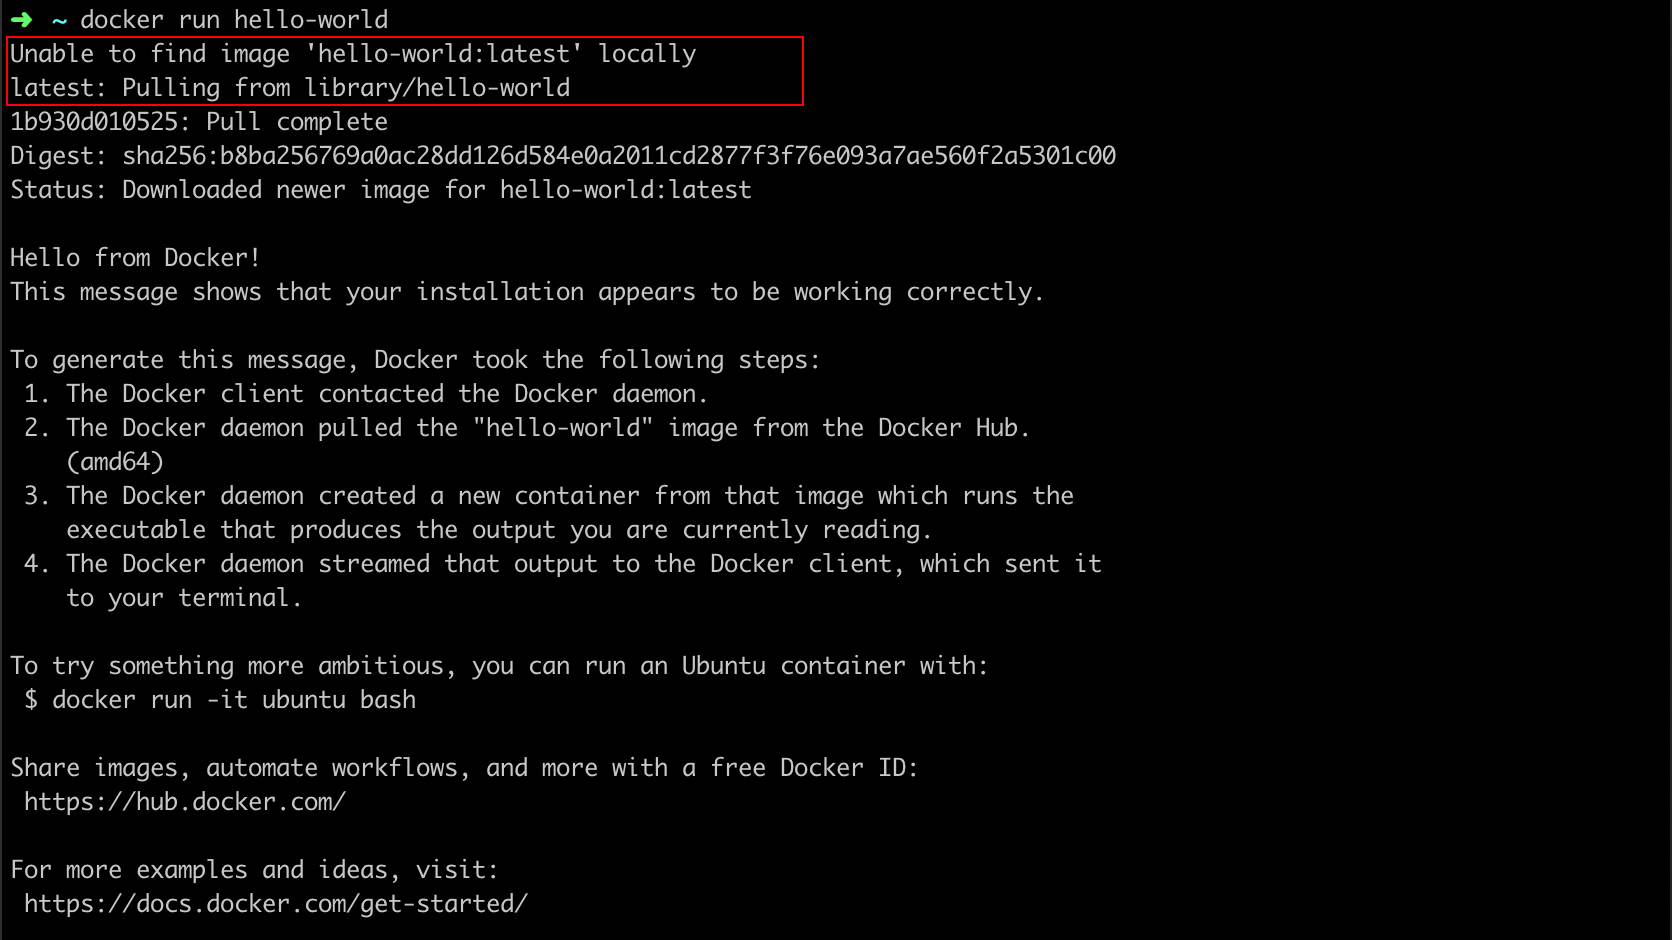
Here’s what happened…
The simple command you just typed actually does a lot of things behind the scenes, and for me, I think it is always a good way to explain or understand things in a visual way.
Therefore, I came up with this diagram to help me understand better the process as well as the Docker architecture.

From the numbered steps, we can see that:
1. Your terminal issued a command starts with docker, so it is actually using the Docker Command Line Interface to contact Docker Daemon;
2. The Docker Daemon(which is a service running on our computer) will first try to find this “hello-world” image on your local. If it cannot find anything, it will get the image from the Docker Hub (of course, someone has created it for public use!);
3. After successfully downloaded that image to your computer, since you said “run” in the command, the Docker Daemon needs to create a container to hold that image (“hello-world”) and run it.
4. Then the output of the “hello-world” image will be sent to the client (therefore, we can see it in our terminal).
Now if you run docker image ls, you can see that the “hello-world” image is there, each image has a unique ID.

And if you run docker container ls -a to list all the containers, you will be able to see the container holding this “hello-world” image, and each container has a unique ID and name.

Part 2: common command for container/image
Now that you have a basic idea about how Docker uses a container to run an image, I have summarised some of the useful commands to play with them. You can try to remove an image, stop/start a container, and also remove it if you want.
Note: you cannot remove a running container, you need to stop it before removing it.
# run again using container ID or name
docker start <container-name/ID>
# stop the container
docker container stop <container-name/ID>
# remove one or more containers
docker container rm <container-name/ID>
# remove all containers
docker container stop $(docker container ls -a -q)
docker container rm $(docker container ls -a -q)

# remove image with its id
docker image rm <image id>
# remove all images from this machine
docker image rm $(docker image ls -a -q)
# (risky) remove all the images and all dependencies
# docker rmi $(docker images -q) -f
Part 3: Project Demo
Let’s dive deeper into the Docker world and find out how we can create an image from source code, push it to the Docker Hub and pull it to any machine you are using.
1. download the project repo from GitHub
git clone https://github.com/lunawen/docker-demo.git
cd docker-demo
2. Project file walkthrough
This is a simple web application built with python and flask. You don’t need to know anything about Flask or Python.
There are three files in this project, and I will go through one by one.
1. Dockerfile
This file is used to tell Docker how to get prepared for running this project.
The things I want you to notice in this file are:
1. we want this project to use python 3.7.4-slim
2. we want to install packages specified in the requirements.txt file (we will look at it later);
3. we are exposing the port 80
4. we define an environment variable (NAME), and we assign the value of NAME to Luna (you can change it if you want)
5. we want to run app.py file when the container launches.
# Use an official Python runtime as a parent image
FROM python:3.7.4-slim

# Set the working directory to /app
WORKDIR /app

# Copy the current directory contents into the container at /app
COPY . /app

# Install any needed packages specified in requirements.txt
RUN pip install --trusted-host pypi.python.org -r requirements.txt

# Make port 80 available to the world outside this container
EXPOSE 80

# Define environment variable
ENV NAME Luna

# Run app.py when the container launches
CMD ["python", "app.py"]
2. requirement.txt
This is a simple .txt file with only one line:
Flask
Refer back to our Dockerfile, we have told Docker to install the packages we specified in the requirement.txt file.
3. app.py
This is the file we want to execute when container launches, and this file is irrelevant to Docker technology. It can be any application you are building.
Quick summary:
As you can see, Dockerfile and requirement.txt files are used for Docker to prepare the environment.
Dockerfile is the main entry point when you run docker run <image>.
requirement.txt is referred by the Dockerfile to get a list of packages we want to install for this project. (This file is optional if your application doesn’t require anything.)
And app.py is holding the application logic (It can be any application built with any technology).
3. Create a docker image from the source code
Now let’s create a docker image from the source code you have just downloaded from my GitHub repository.
All you need is this command:
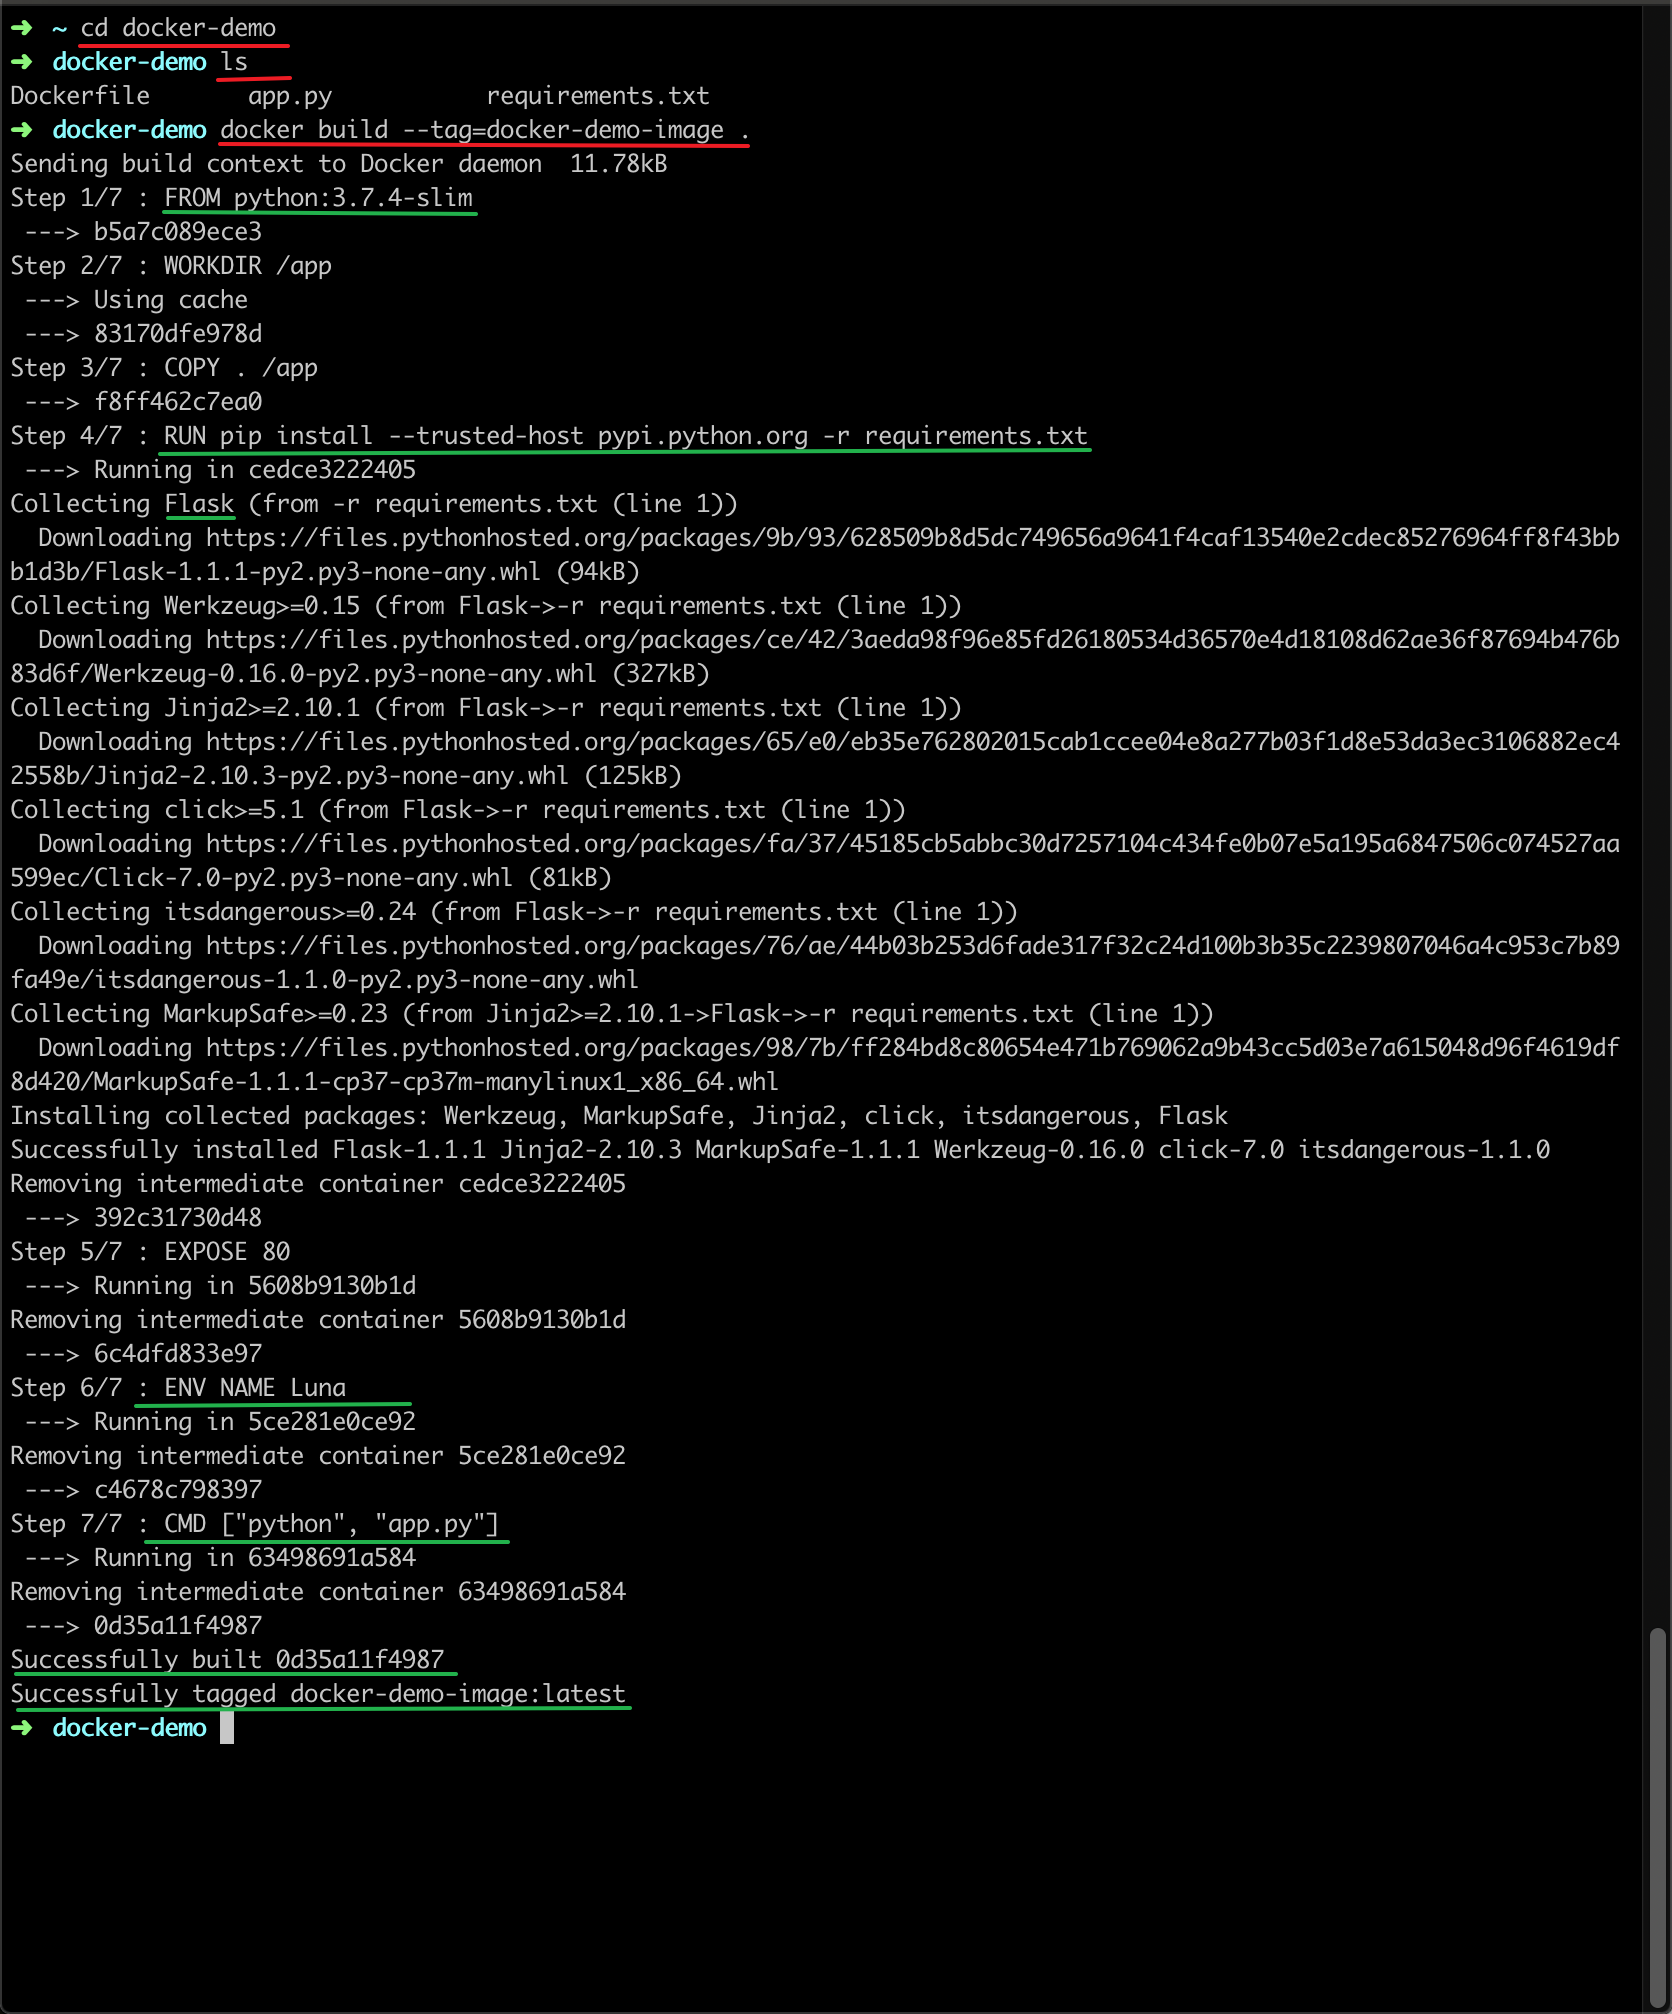
# make sure you are in your project folder
cd your-project-folder
# check if you have the three files I mentioned above
ls
# create an image and name it as docker-demo
docker build --tag=docker-demo-image .
Run docker-demo-image in a container
# check if it is in the image list
docker image ls

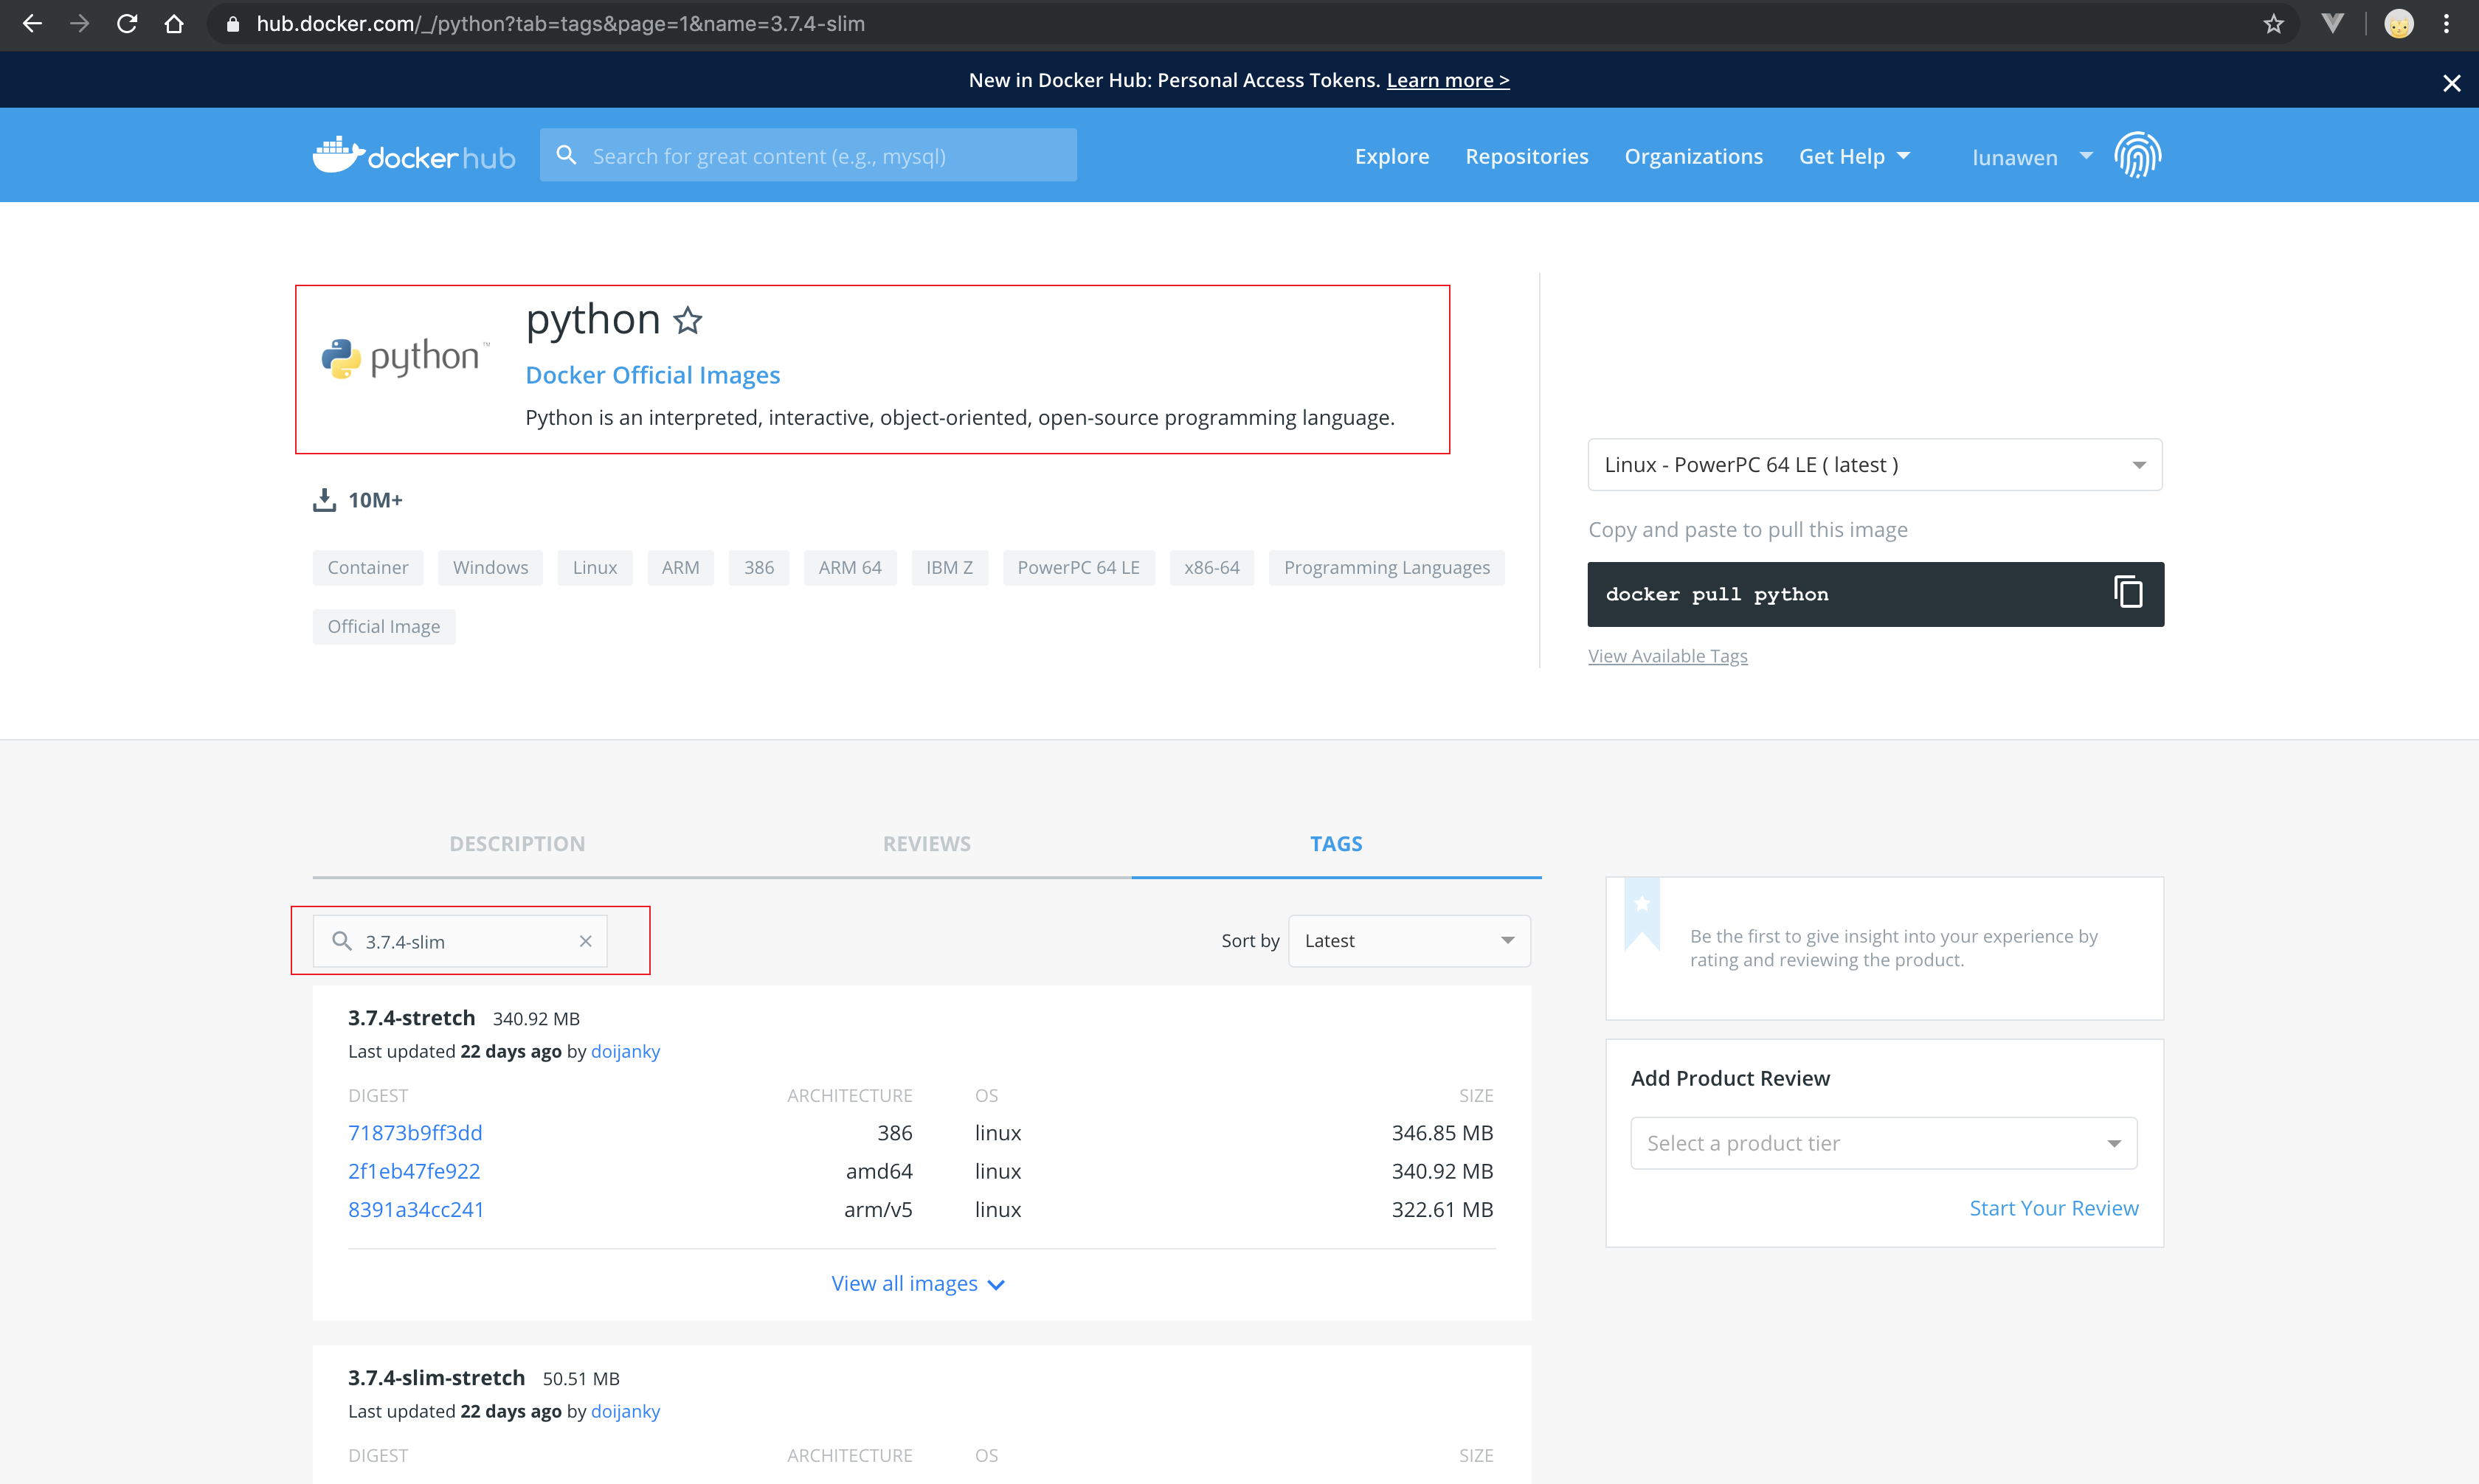
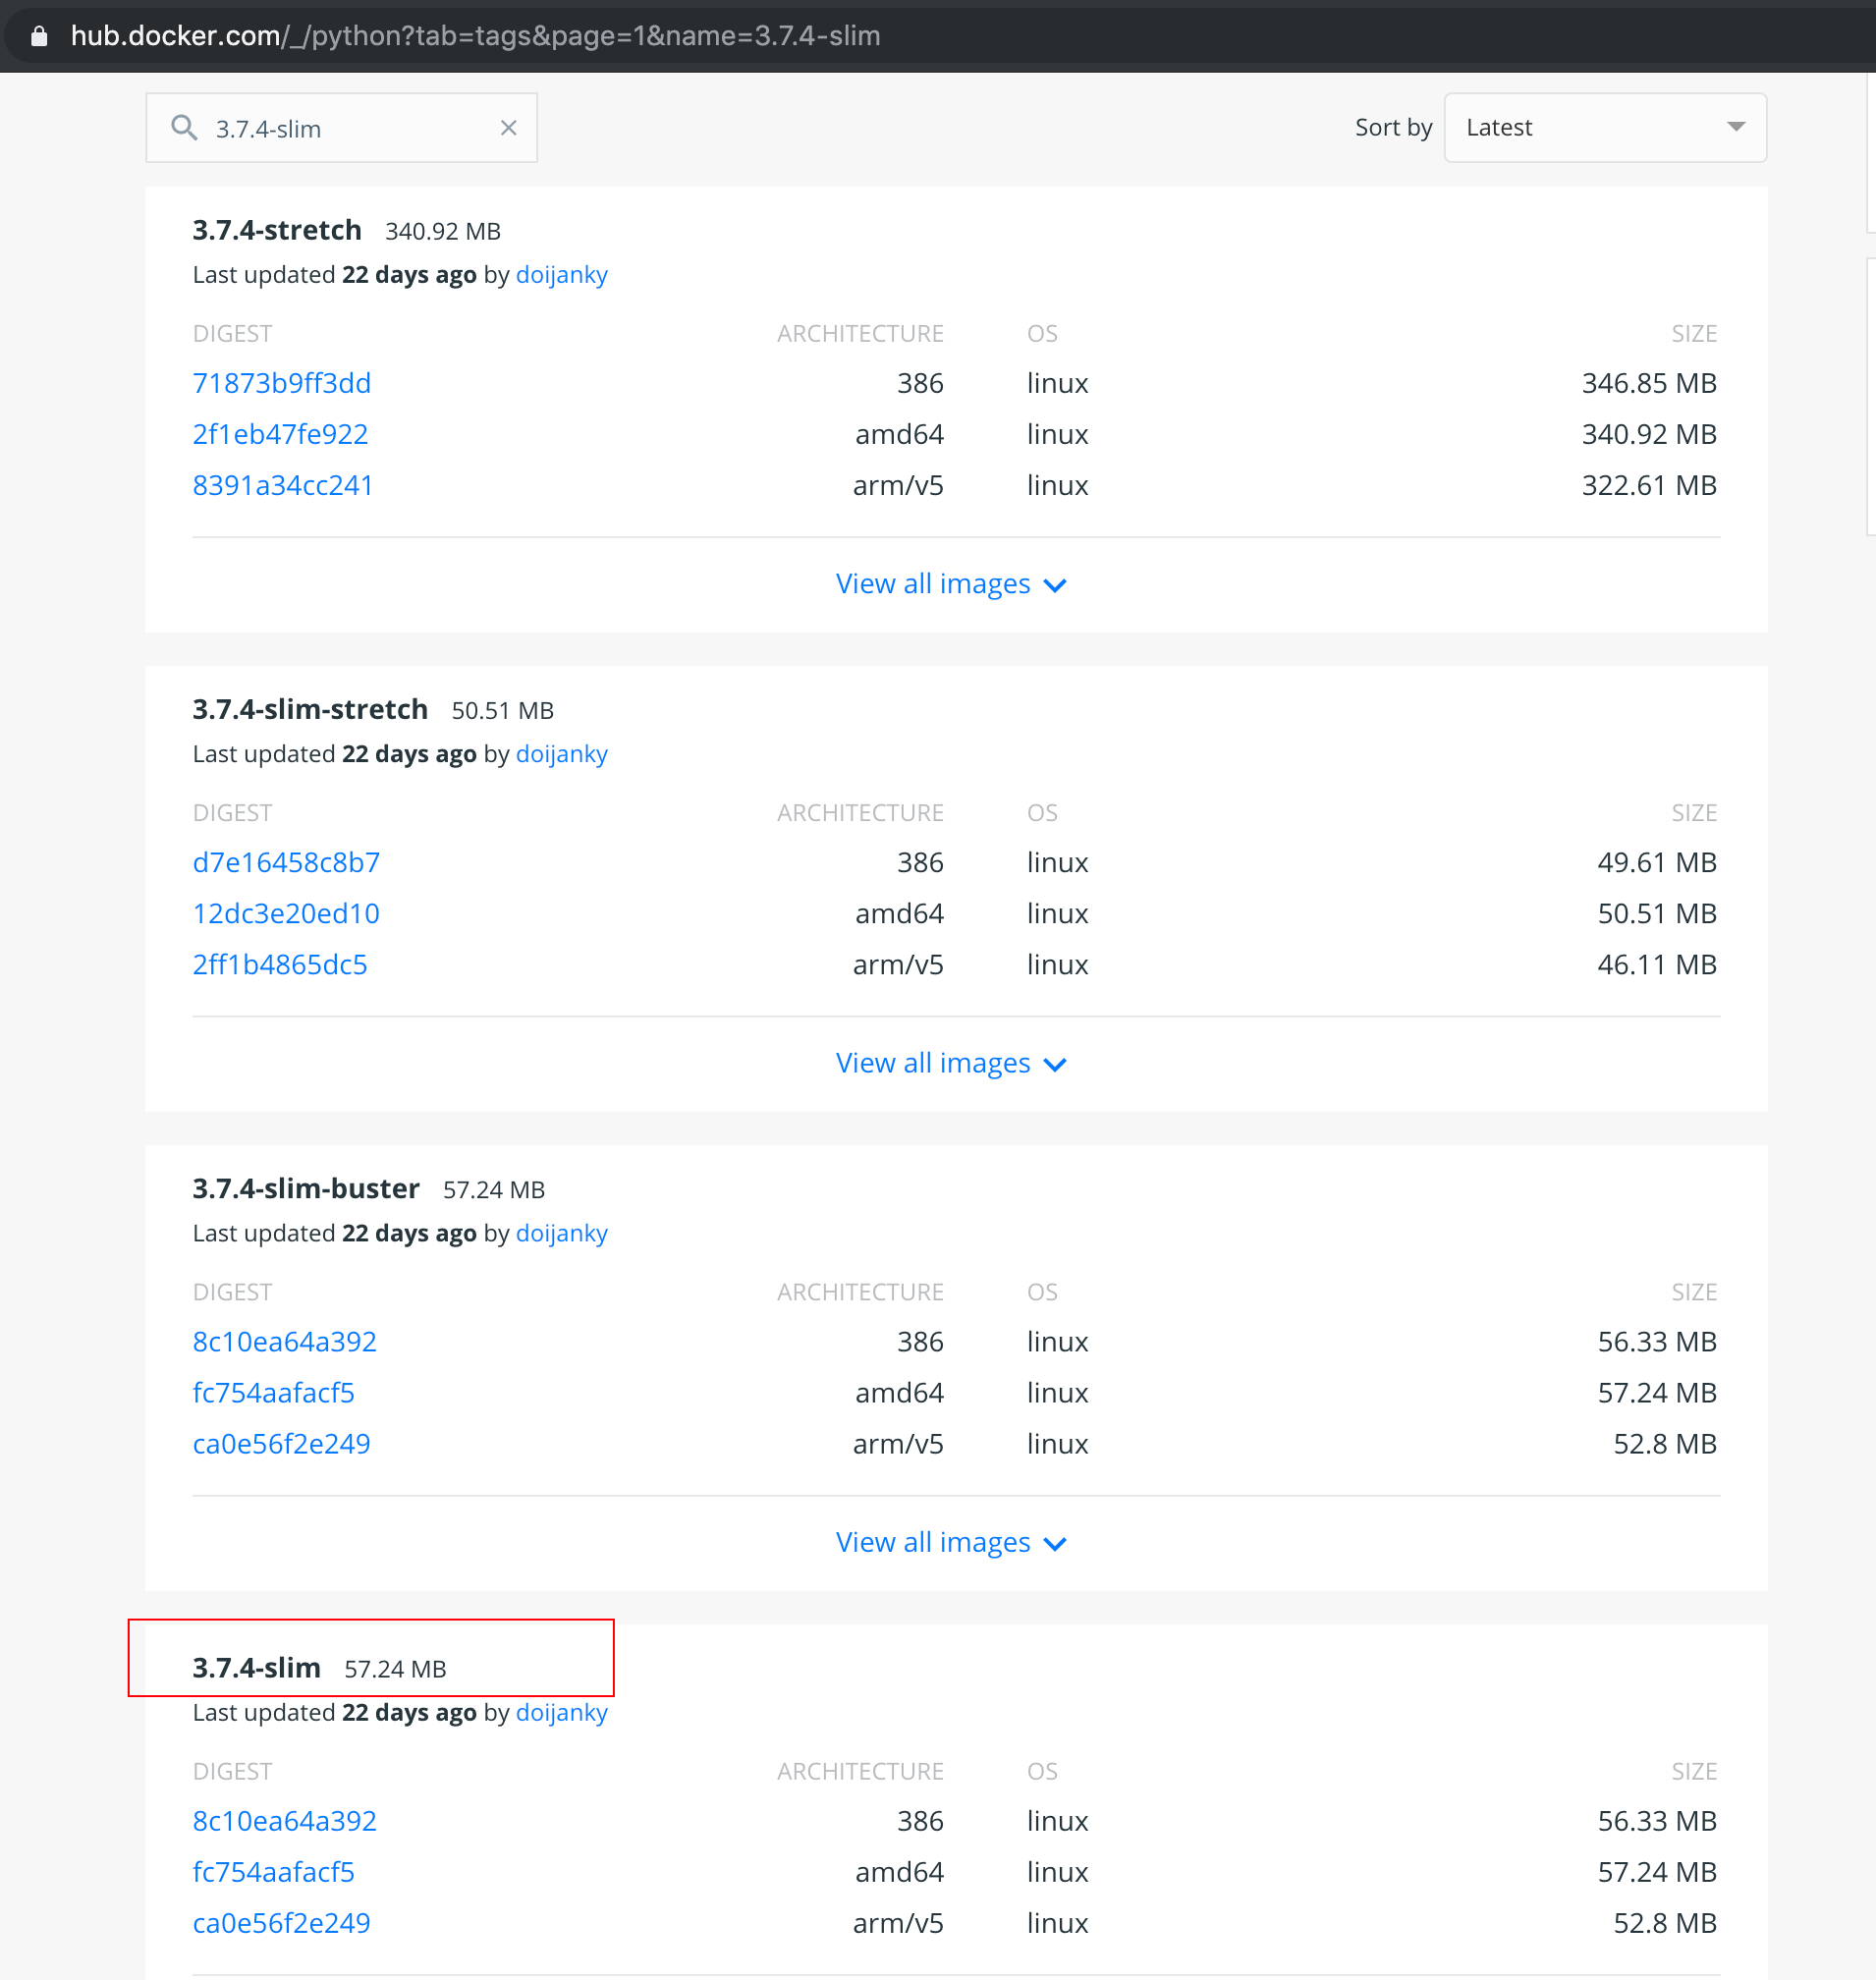
Note we have two images now, because our project is dependent on python 3.7.4-slim.
If you go to Docker Hub and search python, search the tag 3.7.4-slimon that page, you will be able to find the image you downloaded here.
# run this image on localhost port 4000
docker run -d -p 4000:80 docker-demo-image

Now if you open your browser and go to http://localhost:4000, you should be able to see a web page like this:

And you can verify the container ID by using the command:
# list all the containers
docker container ls -a
# list the running containers
docker container ls

Note the command part is based on what we said in the
Dockerfile.And for the ports, it means we are redirecting the exposed port 80 in the container to port 4000 on localhost, that’s why you can see the page on http://localhost:4000
Part 4: Docker Hub
Now that you have experienced how to build an image from the source code, and how to run it in a container, we are going to try something new by making use of our Docker Hub account(which you should have created before).
What we are going to do is simple, and if you have experience with GitHub, you will probably find the concept very similar.
1. Login with your Docker Hub account
# login through command line
docker login
Note: you can also set your account by right click the Docker icon and sign in.
2. Push the image to Docker Hub
First, tag it.
The ultimate goal of this section is to push your local image to your Docker Hub.
Let’s look at a Docker image in more detail:

You can see that each image has a repository and tag.
And if I want to push the docker-demo-image to my Docker Hub, I need to somehow link my local docker-demo-image to a remote URL.
In git, you will do something like git add remote .....
But in Docker, you just link it through:
# docker tag SOURCE_IMAGE[:TAG] TARGET_IMAGE[:TAG]
docker tag docker-demo-image:latest lunawen/docker-hub-demo-tags:v1.0.0
Command breakdown
1. I am using the docker-demo-image as the source image
2. and I explicitly say that I want to use the docker-demo-image with tag latest as the source image
3. lunawen is my docker ID. Please replace with your own docker ID
4. docker-hub-demo-tags is the docker hub repo name I want to use for this image.
5. I also explicitly say that I want the remote image on docker to be tagged as v1.0.0If you don’t explicitly specify the tag for source and target, docker will by default use/assign it as latest.And we end up with another image on the list (actually you can see that lunawen/docker-hub-demo-tags has the same image ID as docker-demo-image, but with different repo name and tag).

And since we haven’t pushed it to the Docker Hub, it is not on my Docker Hub yet.
Why do we need to tag it with our Docker ID?
Because if you try to push the original local image, you will get permission issues.
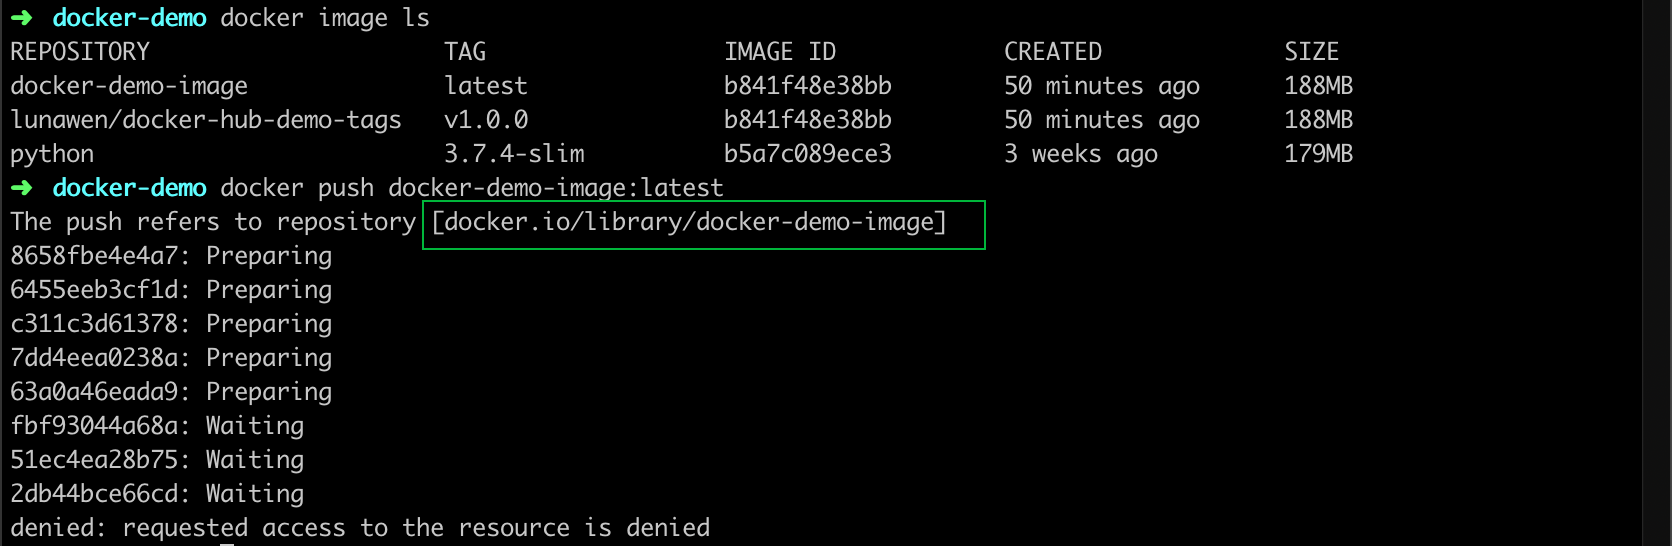
You can see that the image without a docker ID will be pushed to the Docker library, which is where we get our hello-world project if you still remember.
And it would be a disaster if everyone can push something to the public library!
That’s why we need to re-tag our local image, and then push it.
Second, push it.
Push the newly tagged image to your docker hub through this command:
# push to remote docker hub with image name and tag
docker push lunawen/docker-hub-demo-tags:v1.0.0
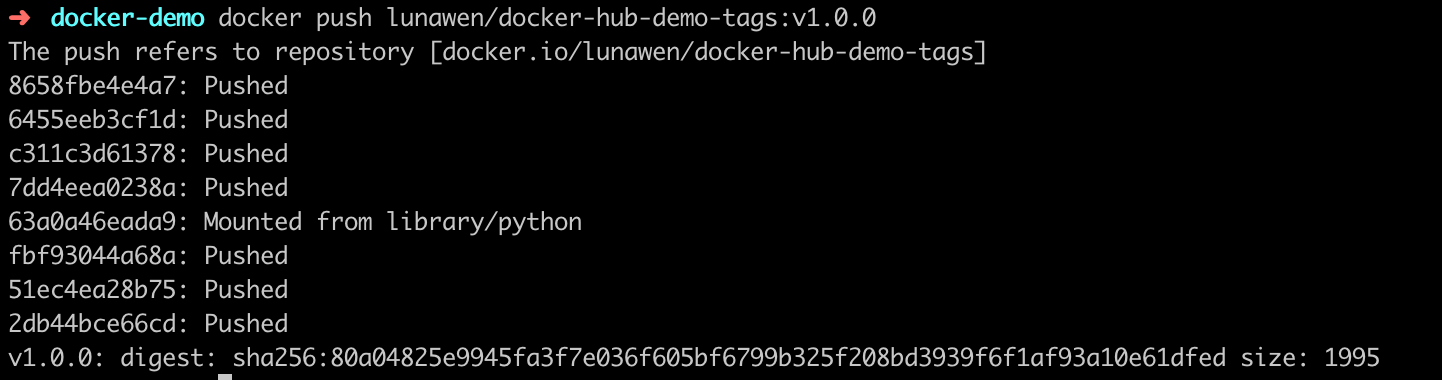
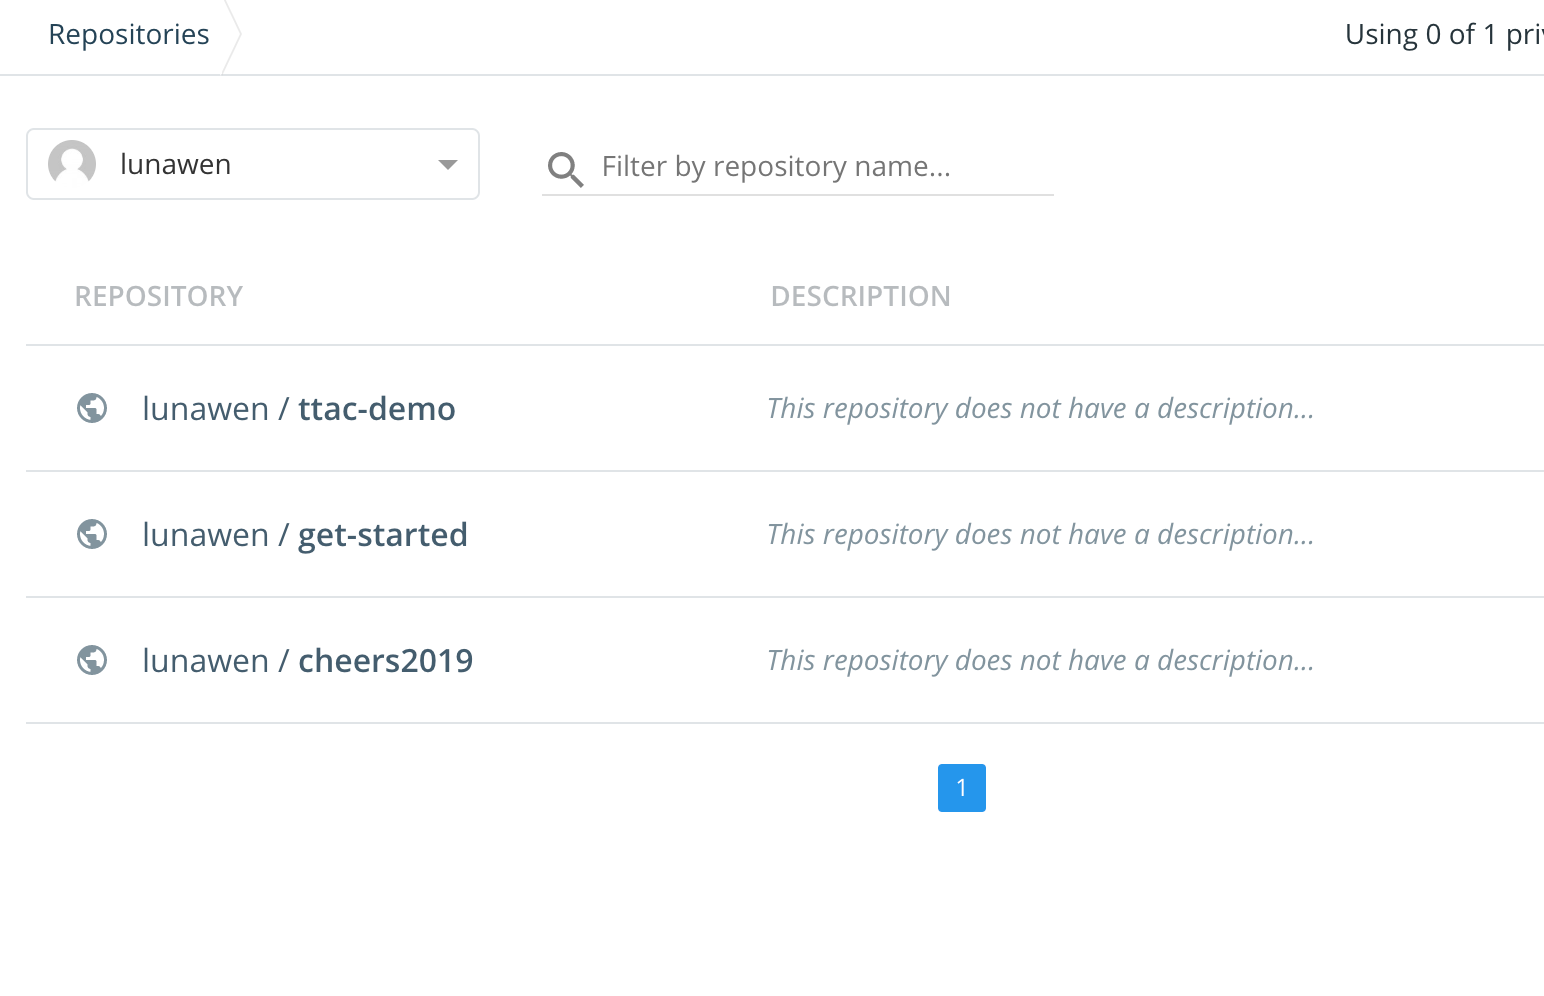
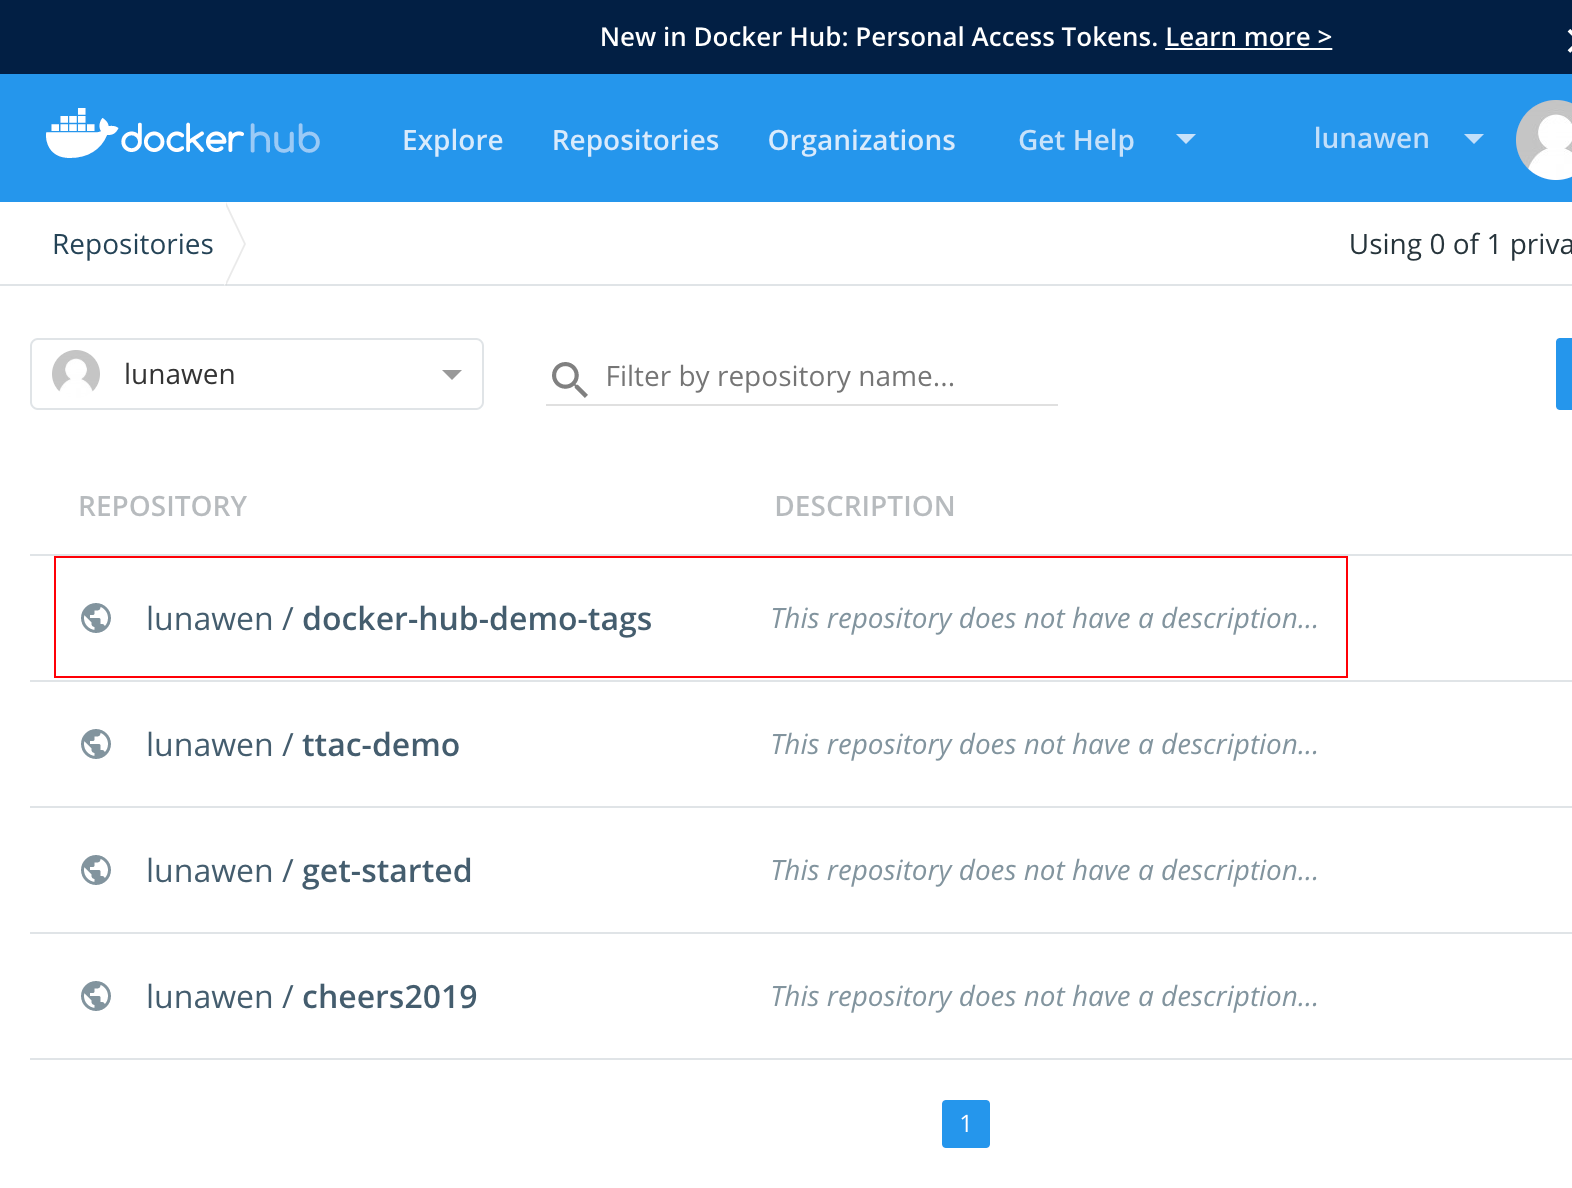
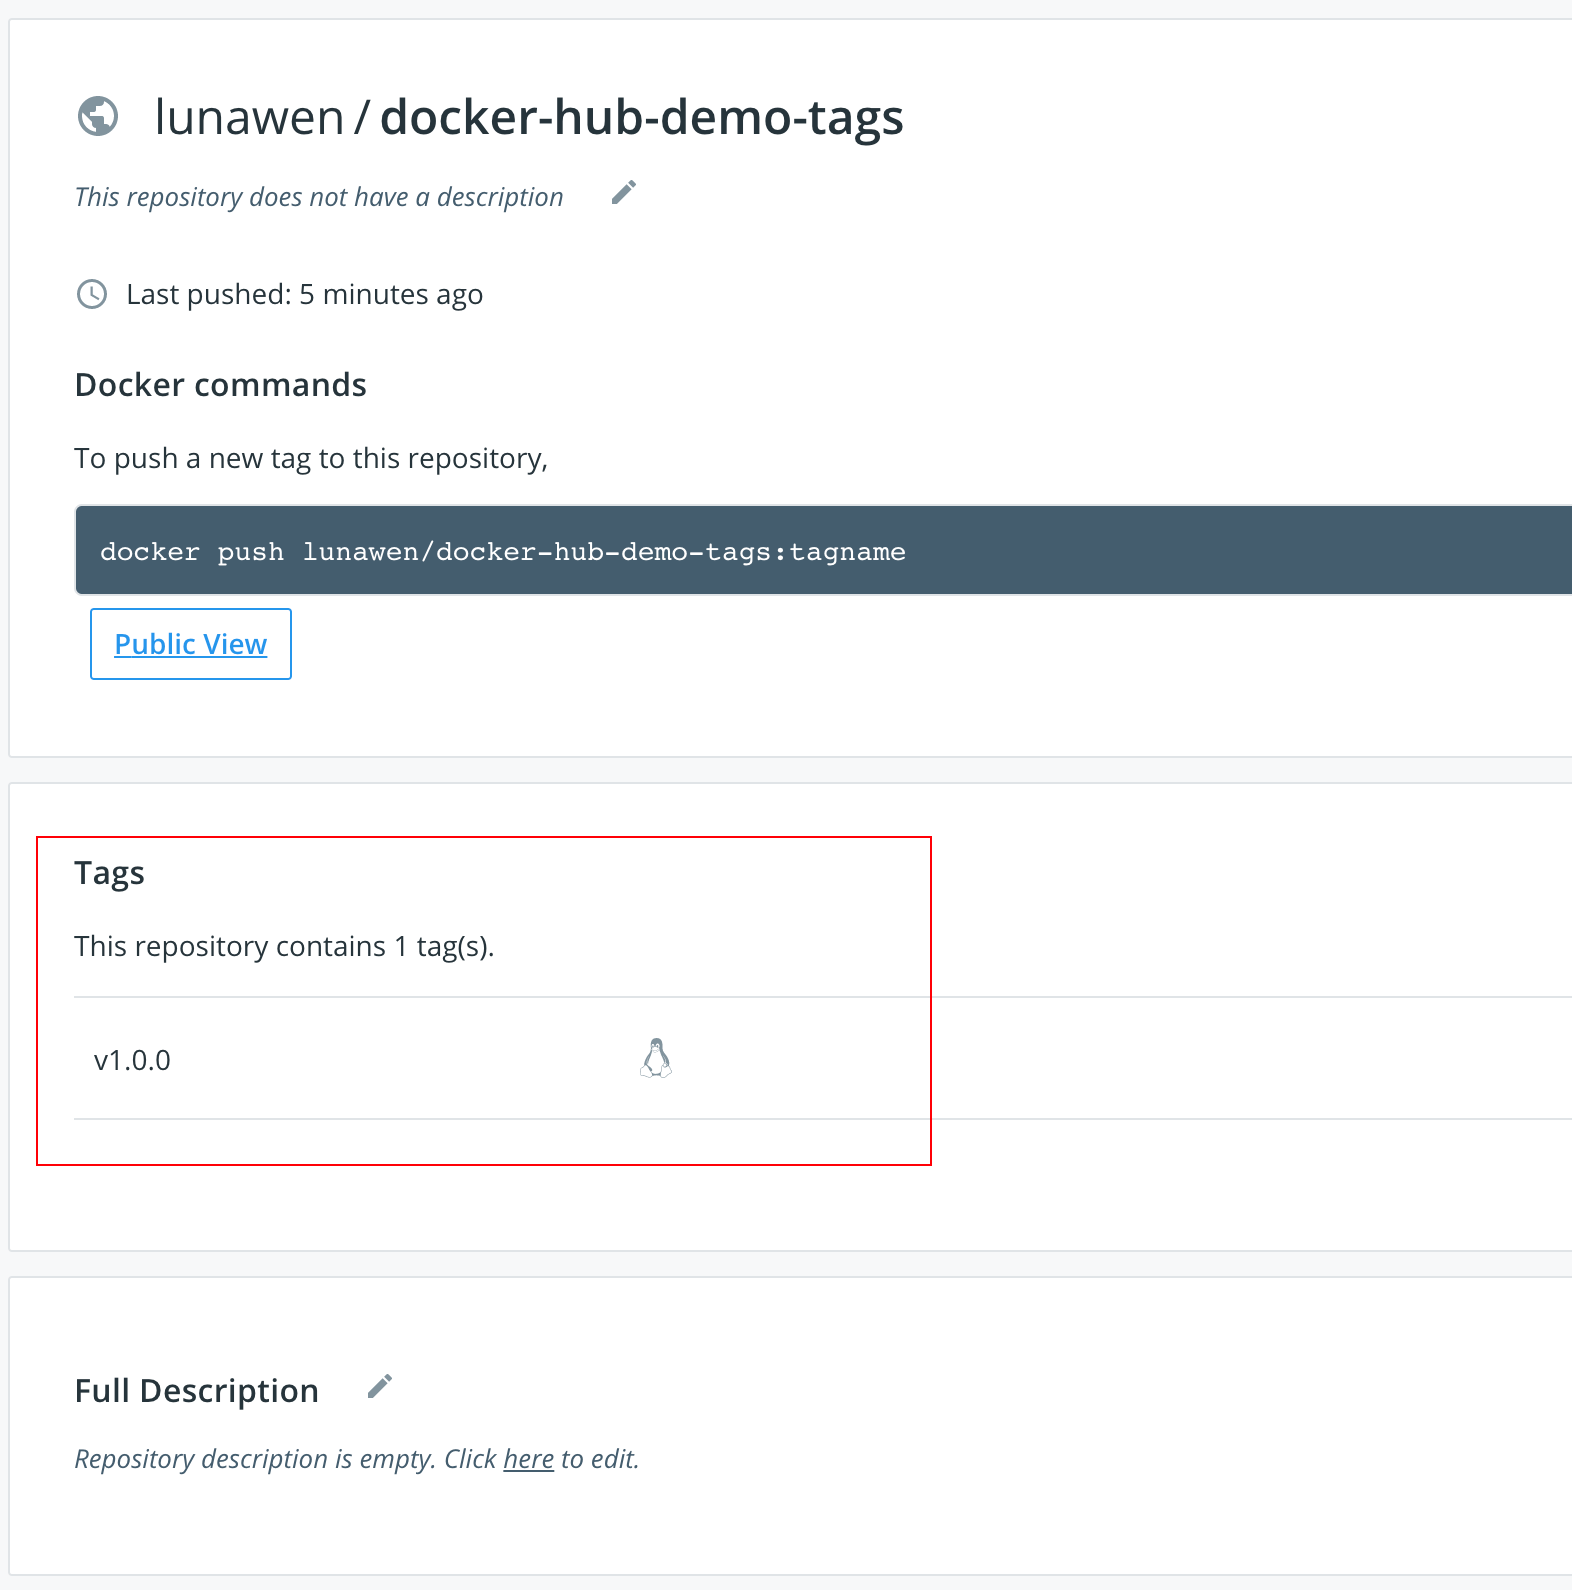
Now check your Docker Hub, and you should be able to see it now!
Third, pull it to any machine with Docker installed and run it!
# we are using port 4001 now to run the project, just in case you didn't stop the previous container.
docker run -d -p 4001:80 lunawen/docker-hub-demo-tags:v1.0.0
Check if you can go to http://localhost:4001 and see the same result (of course, difference container ID).

And if you look at your container list now, you can see that the local image is using port 4000, and the one from Docker Hub is using port 4001.

Summary
If you reached here, I must say congratulations! You have gained a fair amount of knowledge about Docker, and you are ready to go to the next level!
So what are the takeaways from this tutorial?
1. You understand the use of Dockerfile;
2. You know how to create a Docker image from source code;
3. You know how to run a Docker image in a container and specify different ports;
4. You know how to tag a Docker image properly before pushing it to Docker Hub;
5. You know how to push a Docker image and how to pull it from the Docker Hub.
6. You also know how to check your images list, containers list, and how to start/stop/remove certain things.
And this is a diagram of our workflow.

Boom! That’s actually a lot!
And to be honest, for me, I struggled with the things I mentioned here and spent a lot of time to figure out what is happening. So hopefully, this post can save you some time :)
Other than that: Please note that the comment feature for my blog is currently under development, and I am thinking of using isso or discourse , both are open source and requires to use Docker to set up (that’s why I need to have some knowledge about Docker to do my commenting system, haha!).
Meanwhile, you can reach me via wechat official account, LinkedIn, or GitHub (just click on the right top buttons of this page).
References: