Integrate Google OAuth in Nuxt.js Framework
2021-07-18
0. 前言
最近在研究 Vue.js 和 Nuxt.js 框架,然后想做一个 Google OAuth 的 integration,结果发现有挺多坑的,网上的资料查了很多,走了很多弯路,最终今天总算找到了一个靠谱的 tutorial,并且成功实现了这个功能。
这篇文章就来总结一下期间遇到的一些困难和解决方案,希望对于正在挠头的程序员同胞们有所帮助。
1. 技术栈
只做了前端的 integration,用的是以下技术:
- Vue 2.x,因为 Nuxt.js 目前对 Vue 3.x 的支持还属于初级阶段;
- Nuxt.js 作为 framework(这里有坑);
- TypeScript(这里有坑);
- Vuetify 作为 UI Framework(这个其实不重要);
2. Google Dev Console 的设置
Google 的文档其实写的有点乱。。我找了好几个看似跟 Sign-in 有关的页面,但是都跟我要实现的东西没啥关系,所以浪费了很多时间 ┭┮﹏┭┮
其实 web application 需要的就是这个教程:Integrating Google Sign-In into your web app
下面是图解版本:
1. 登录 Google Cloud Platform
https://console.cloud.google.com/
2. 创建一个新项目
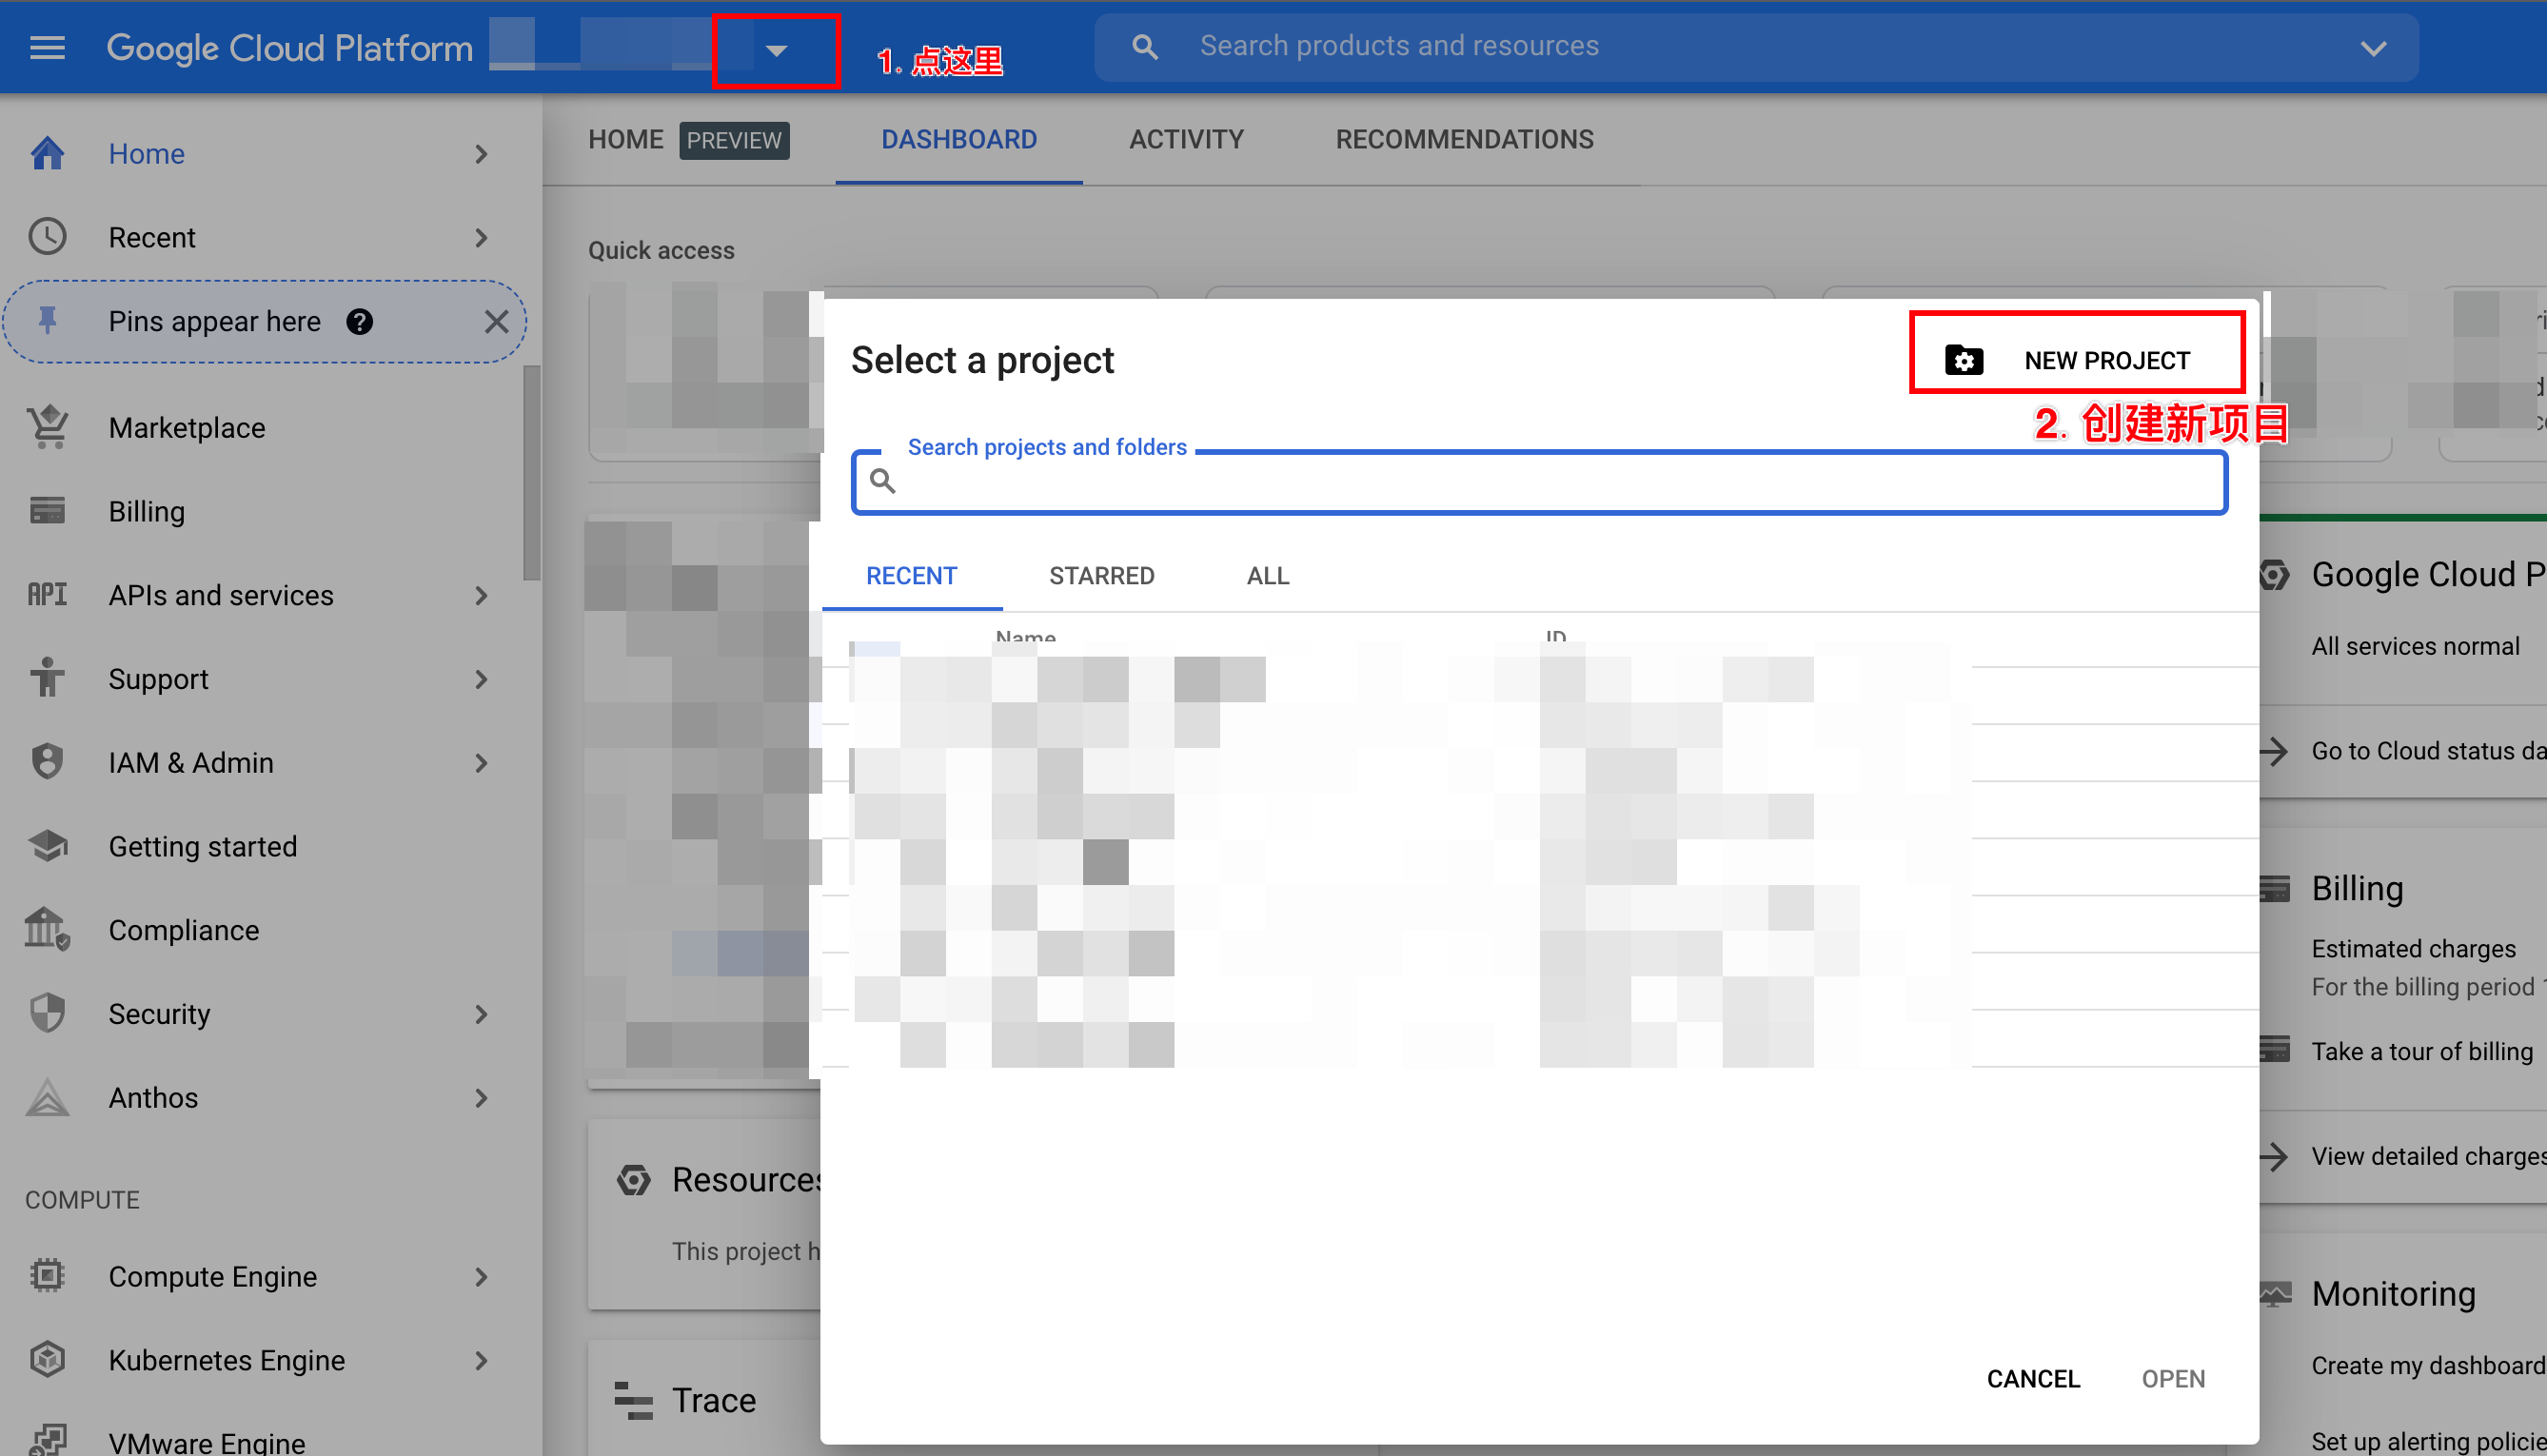
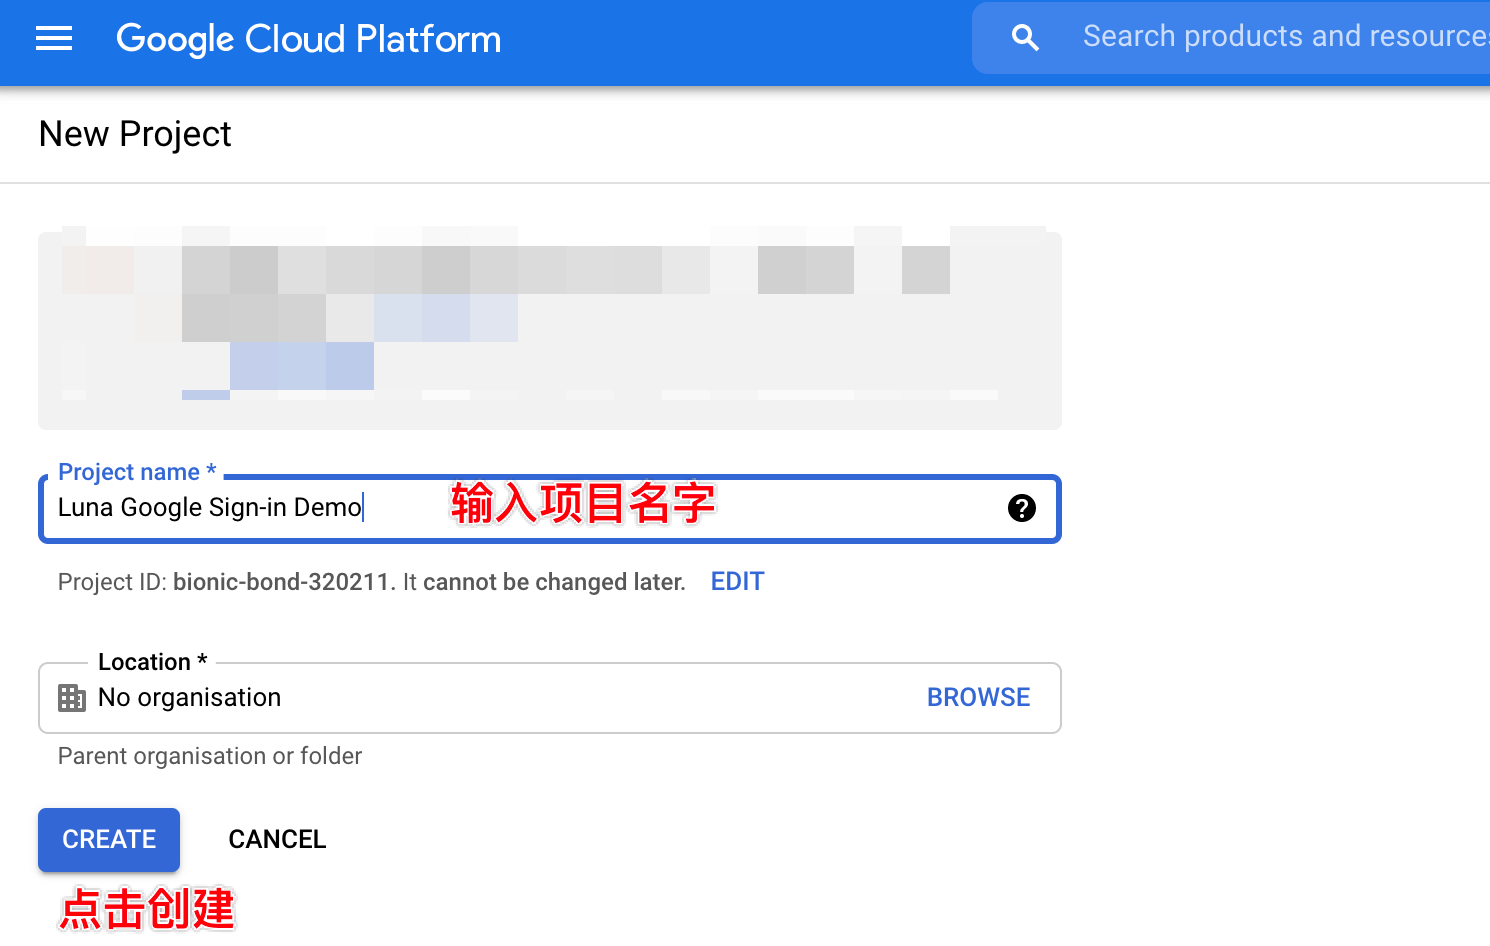
3. 进入 credentials 页面
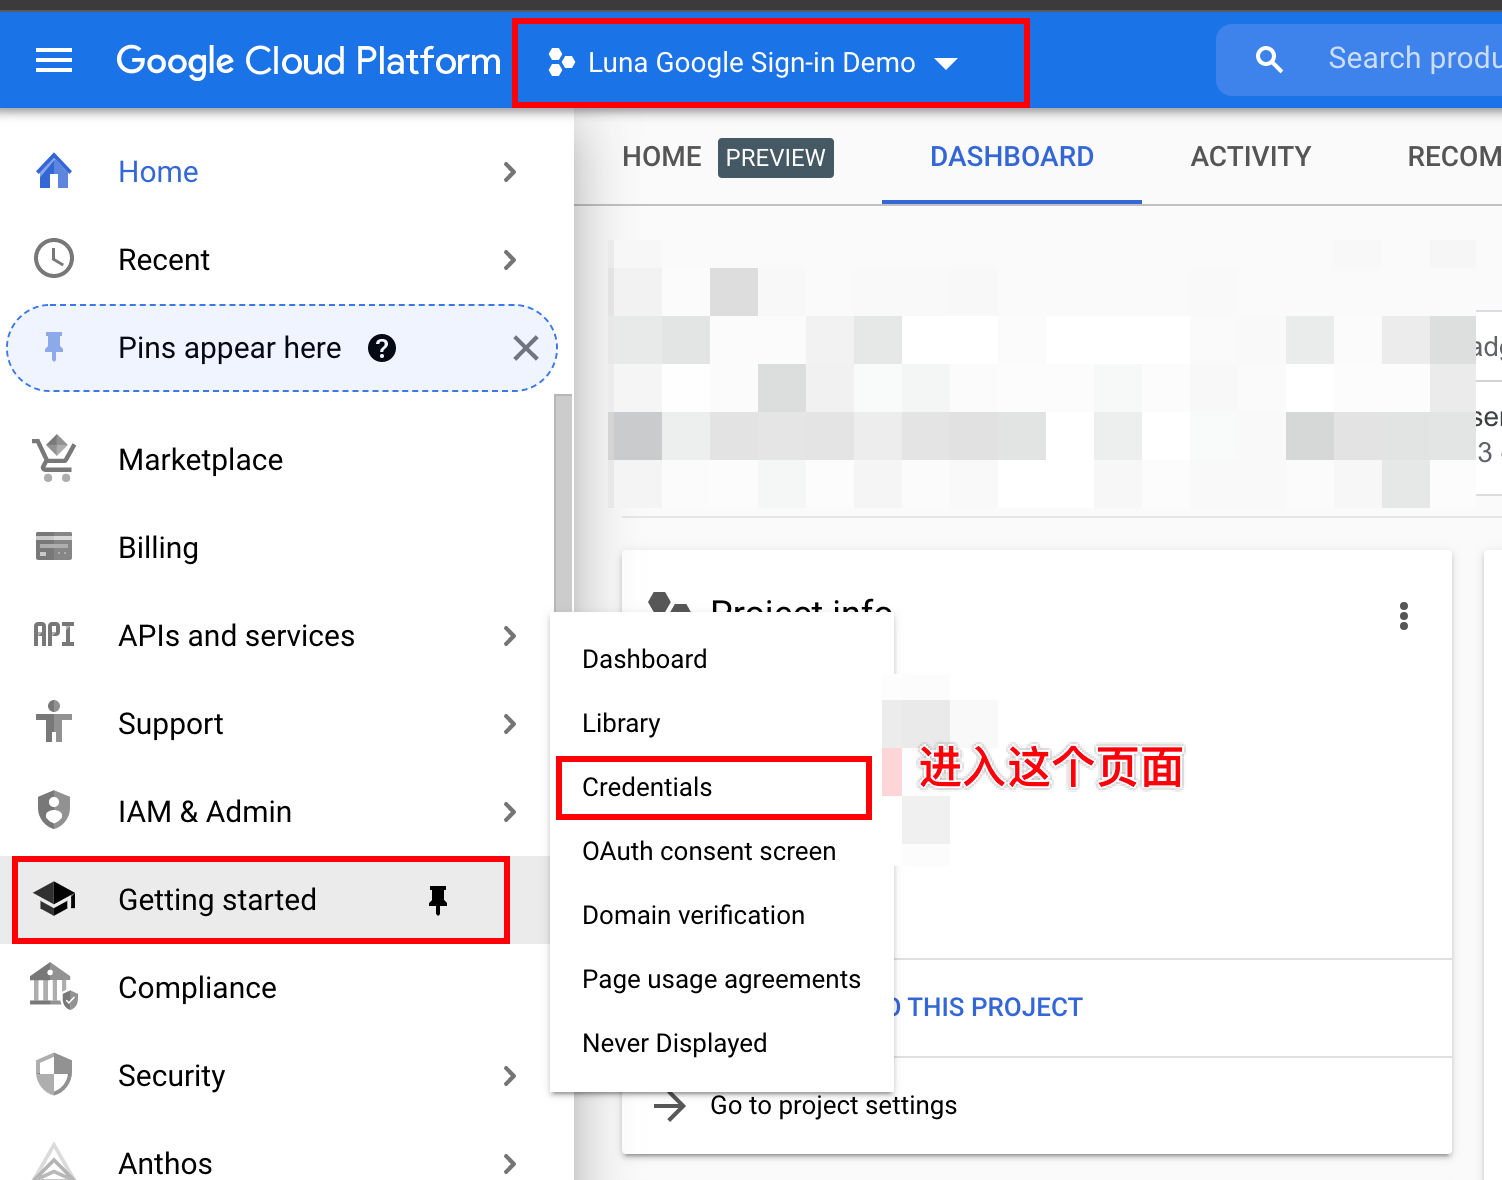
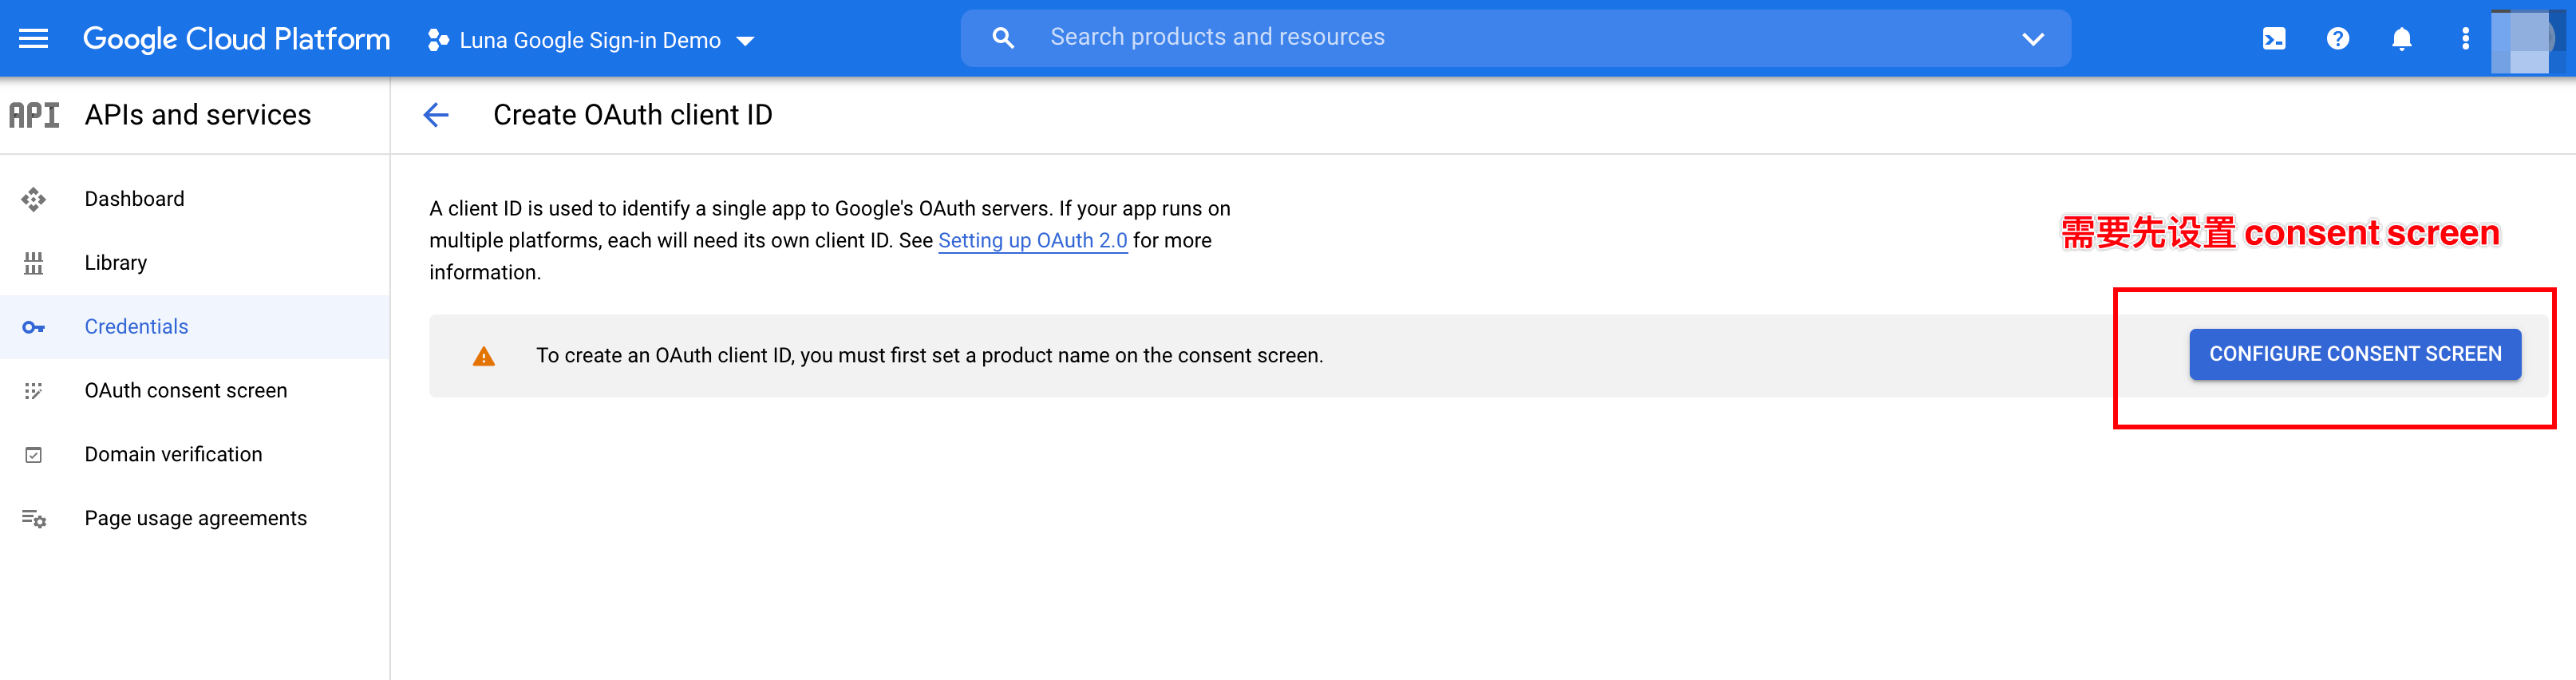
4. 创建 OAuth Client ID
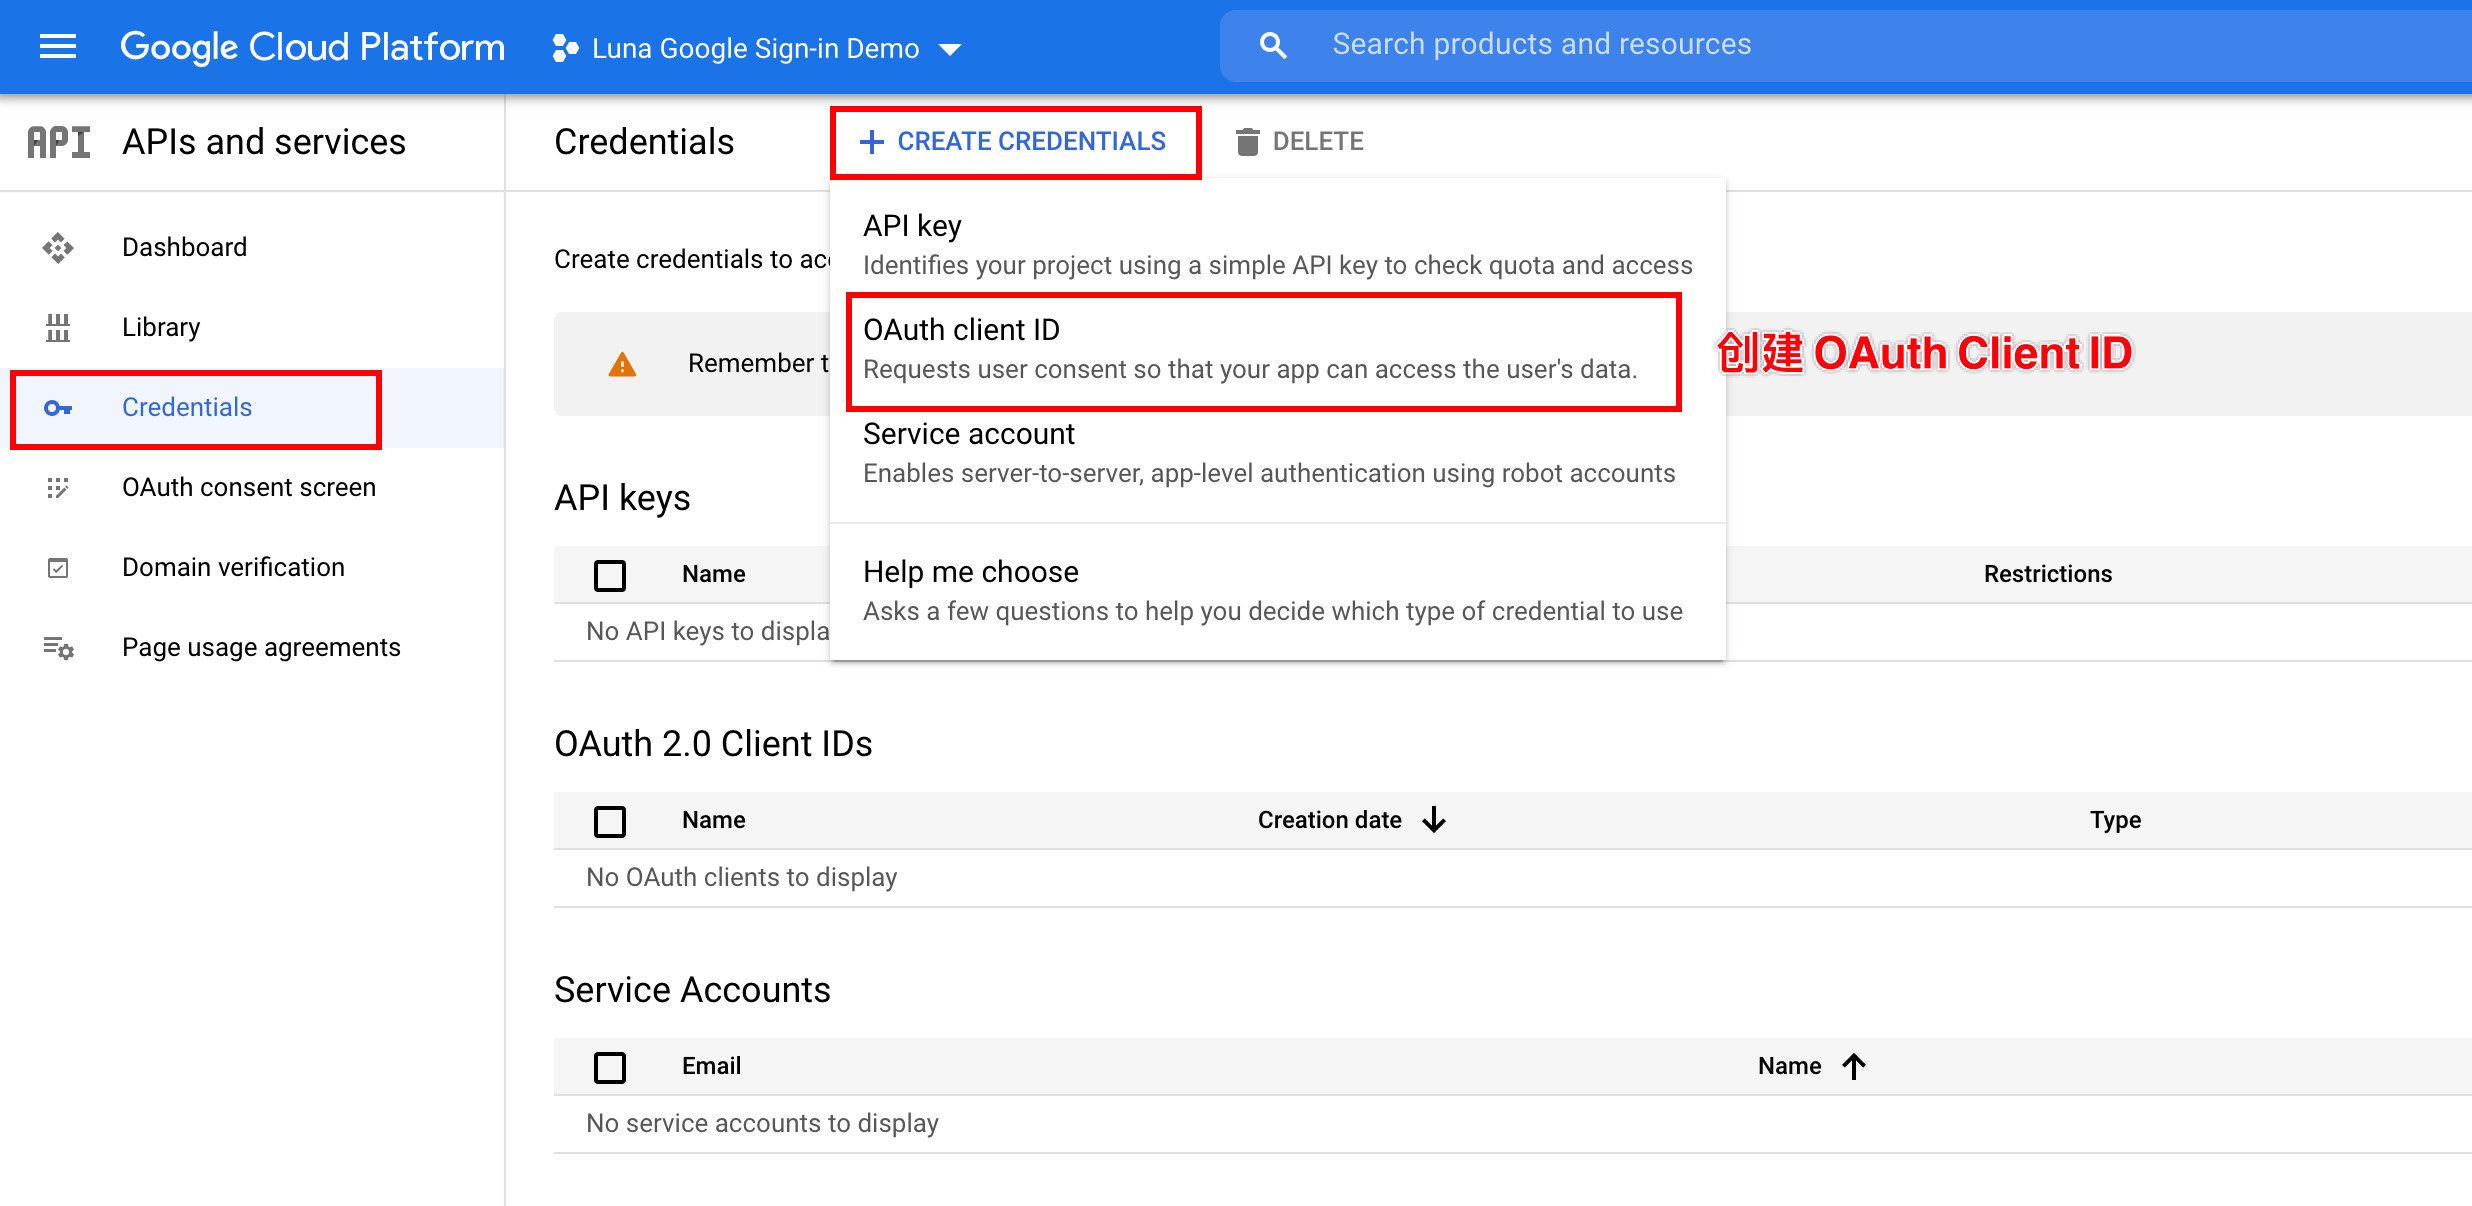
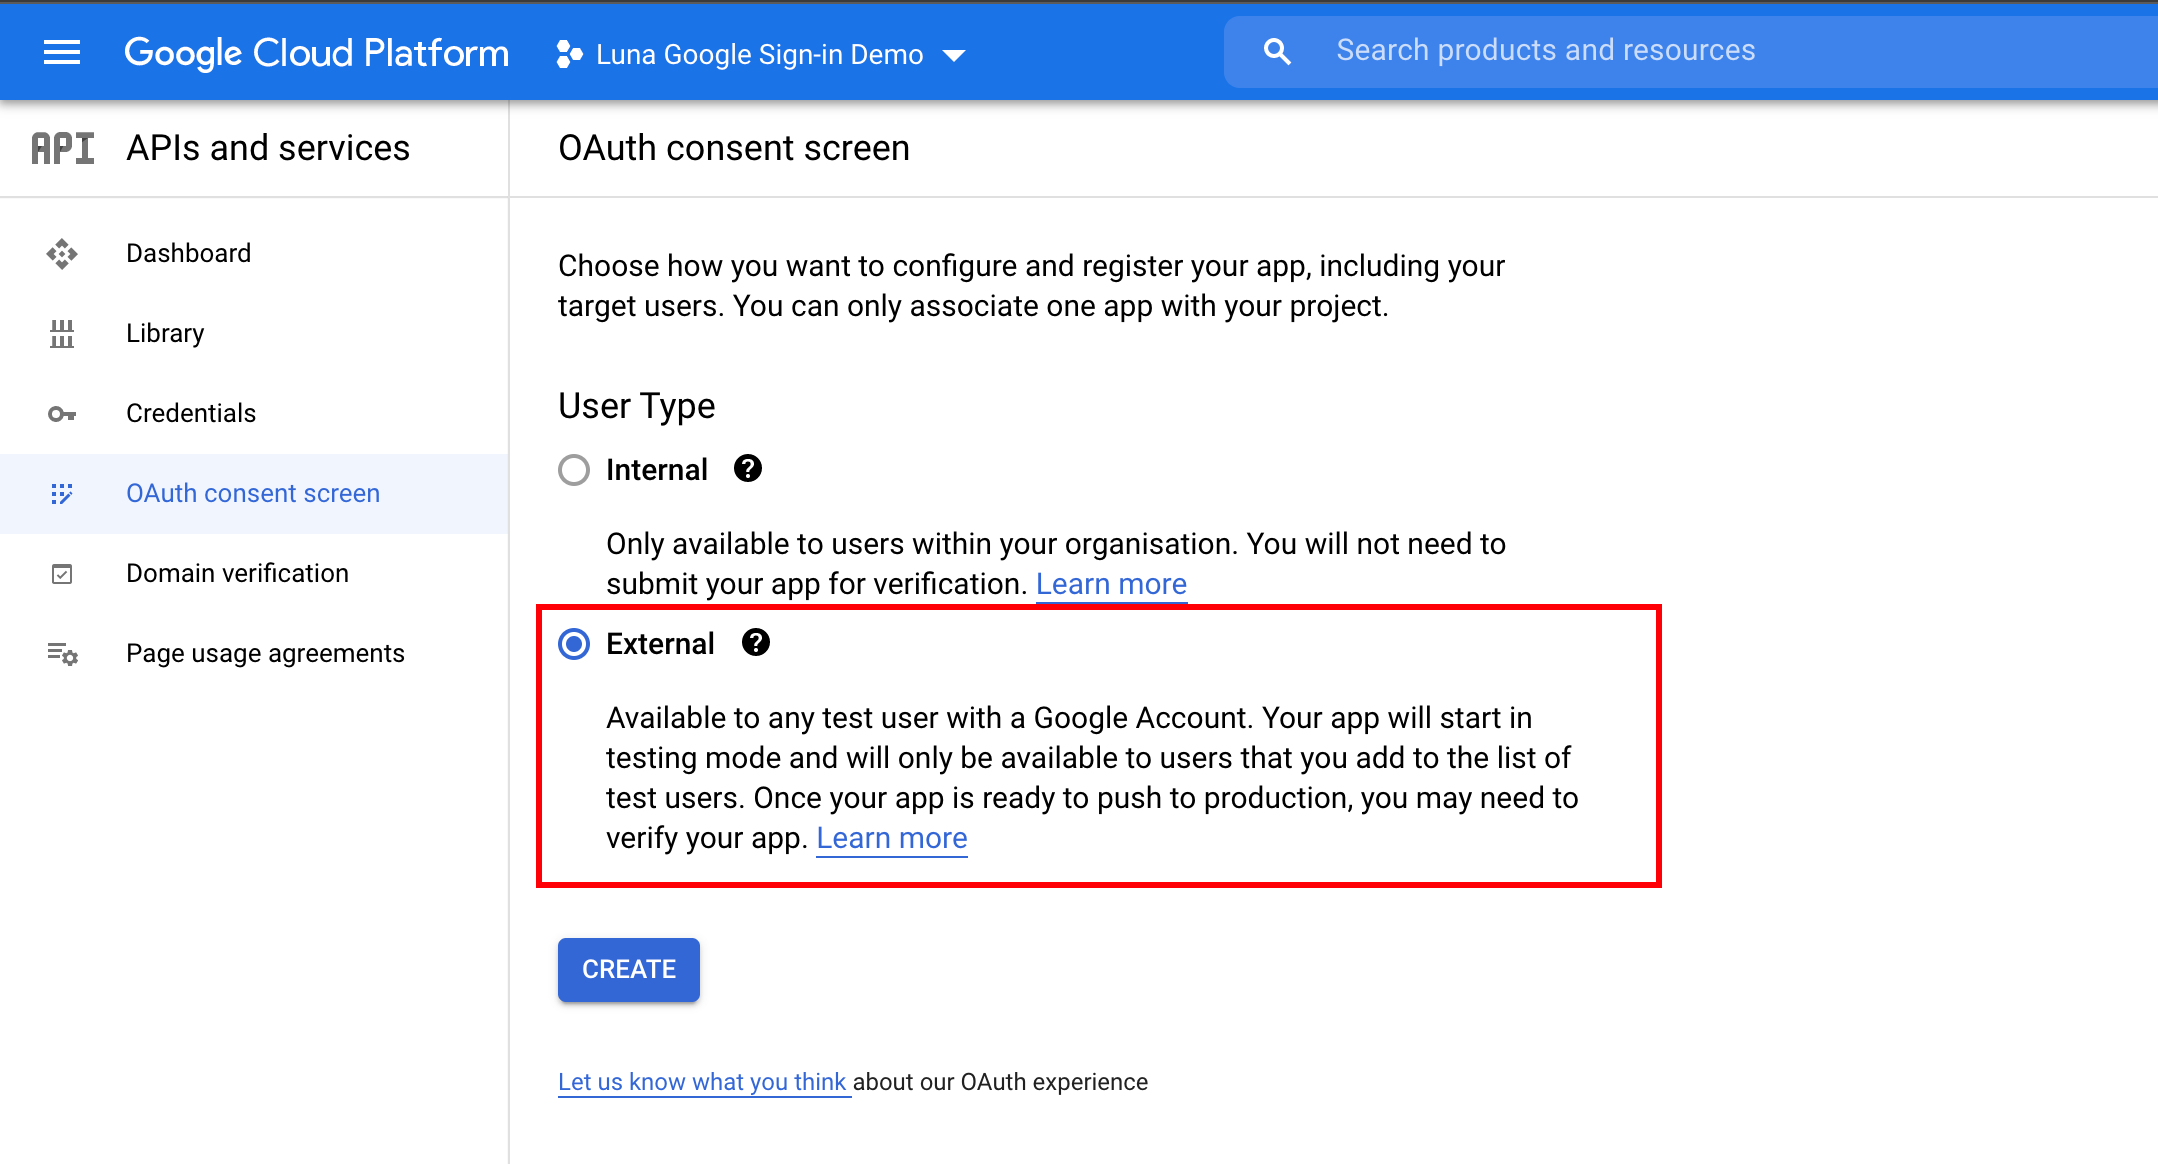
5. 设置 consent screen
6. 如果这个项目是一个公开的项目,就选择 external
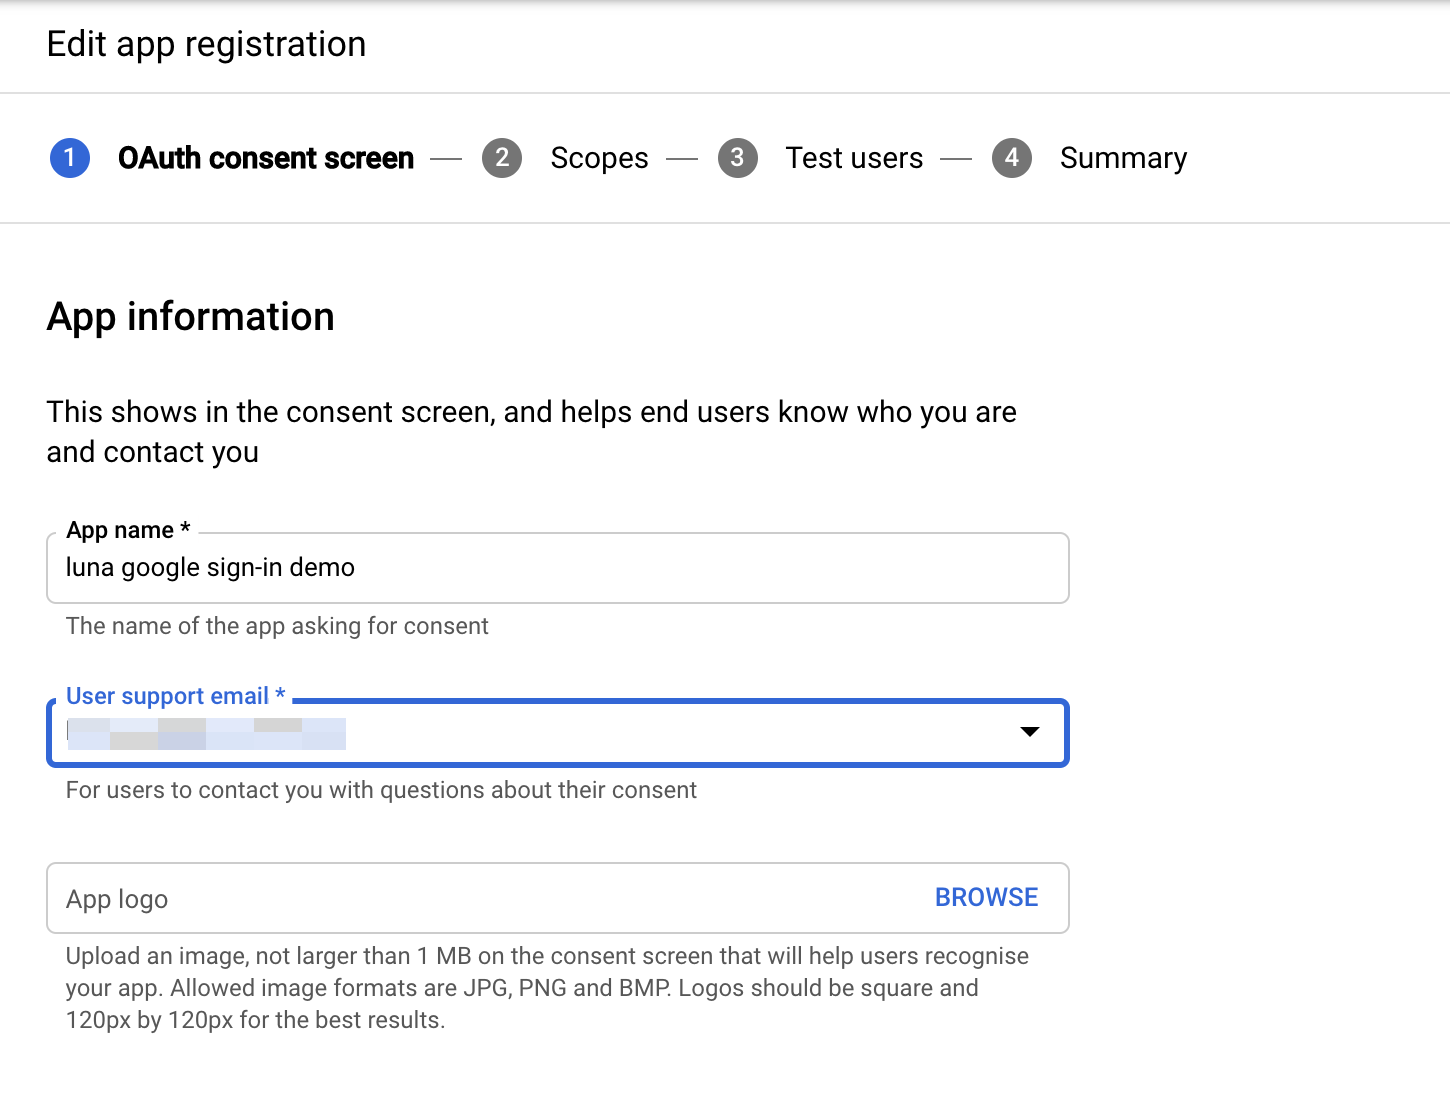
7. Register App,很多内容不用填
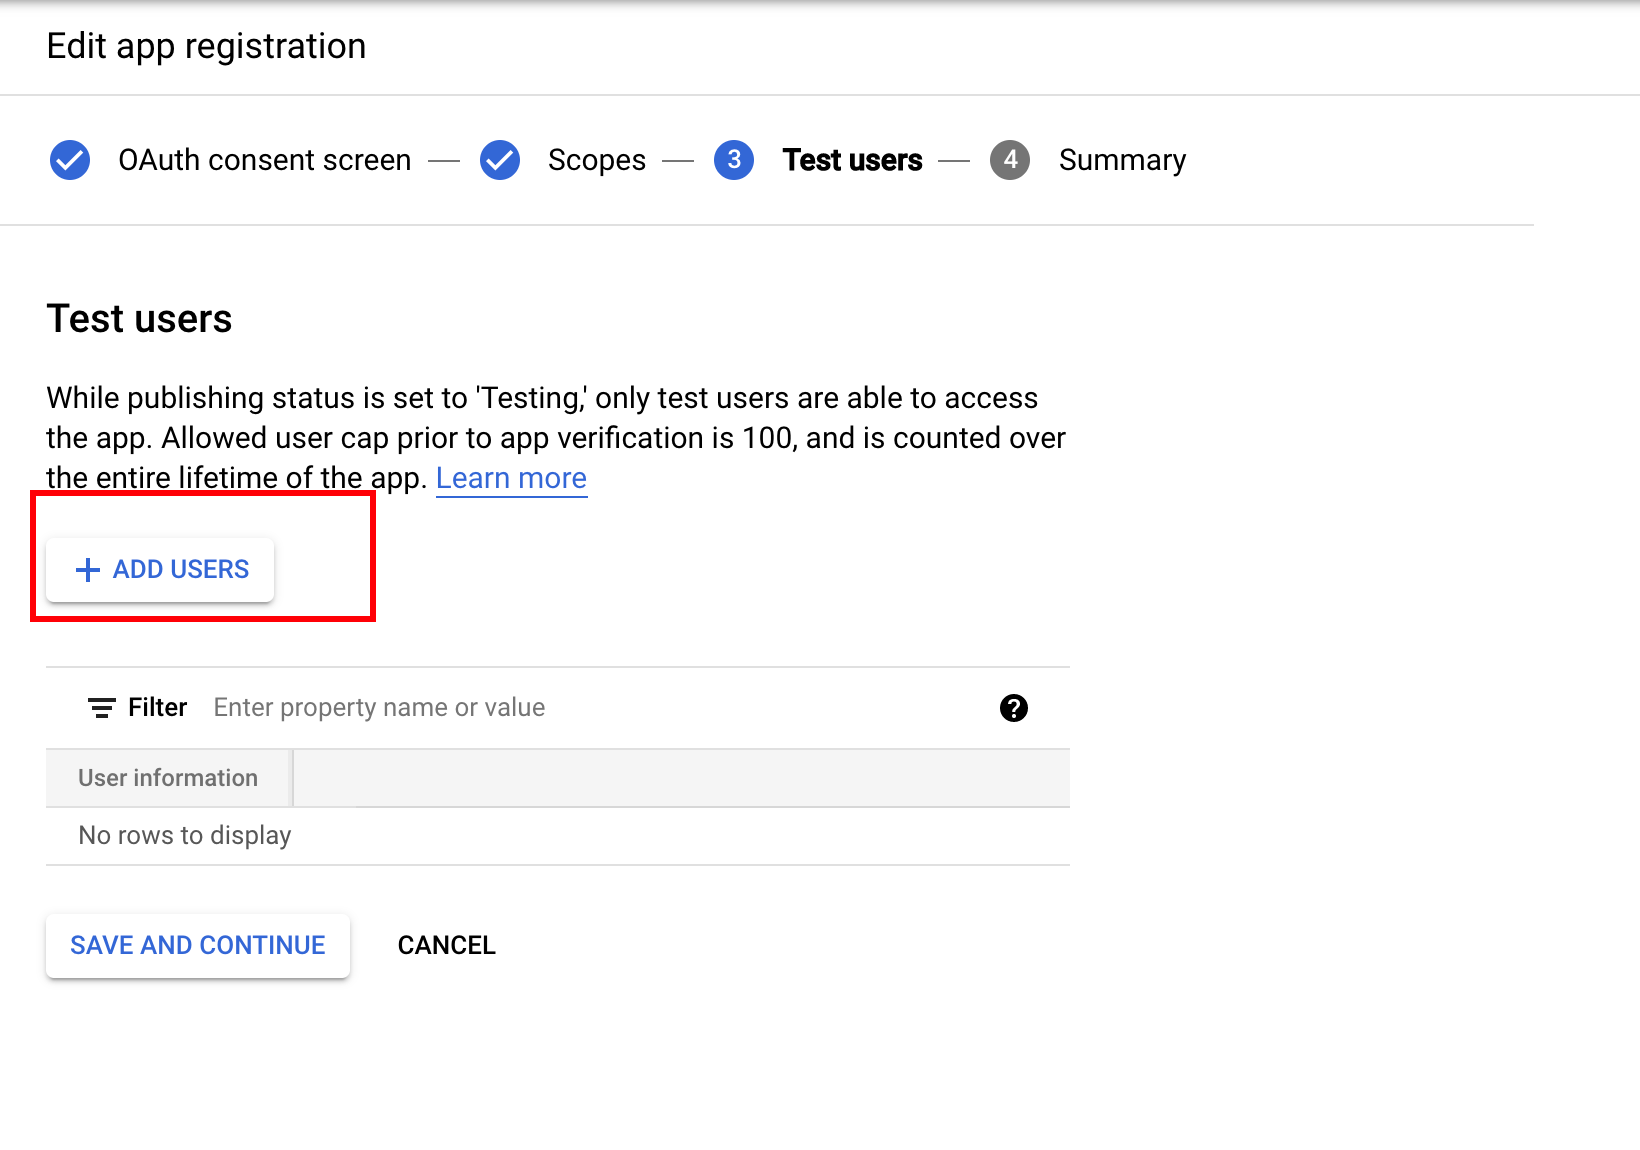
8. Scope 保持默认,Test user 可以根据需要添加(之后也可以增减)
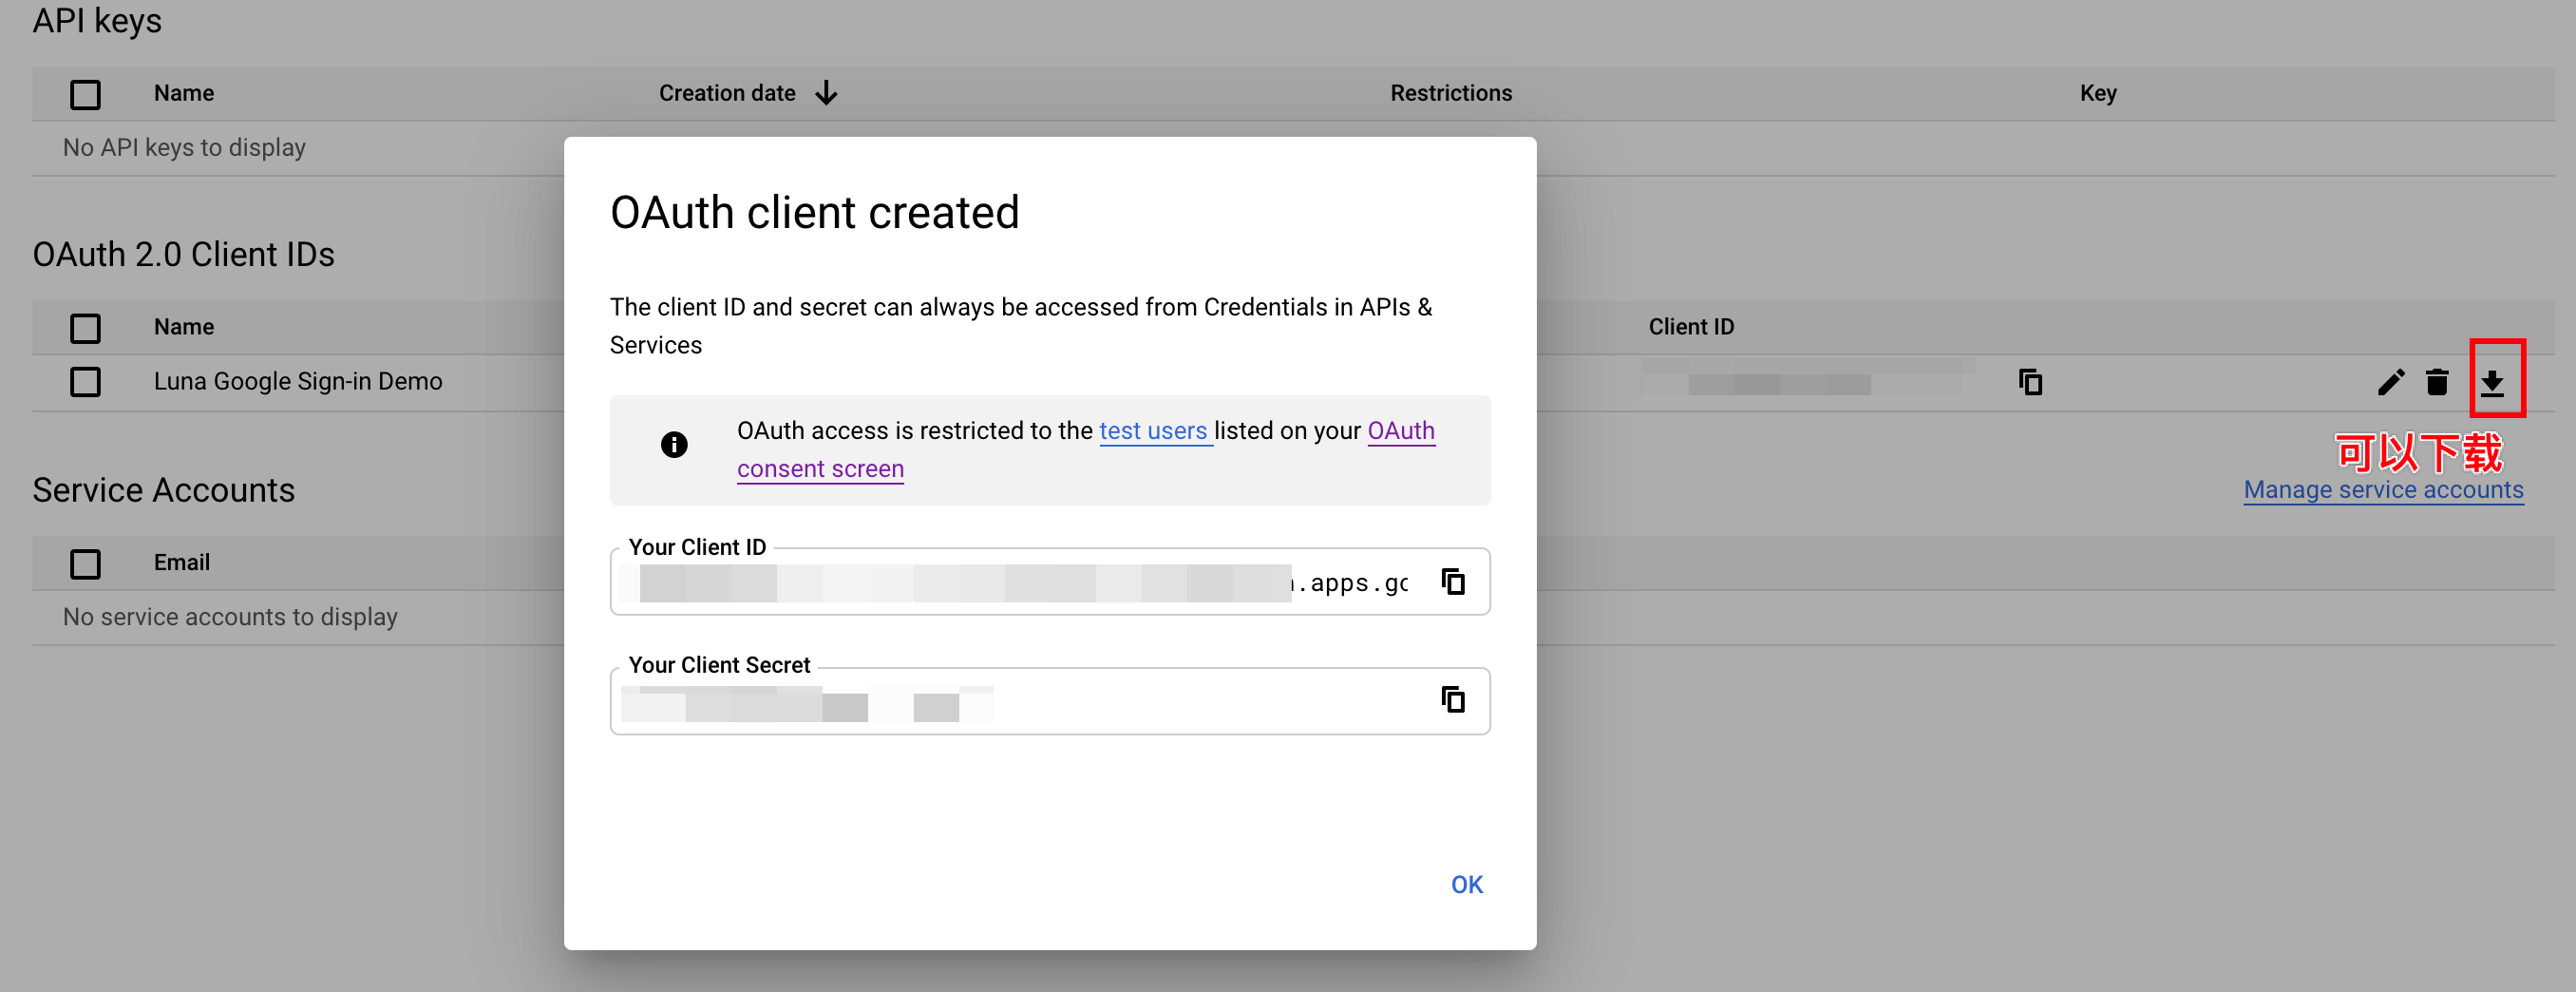
9. 完成之后回到 OAuth Client ID creation 那边填写信息
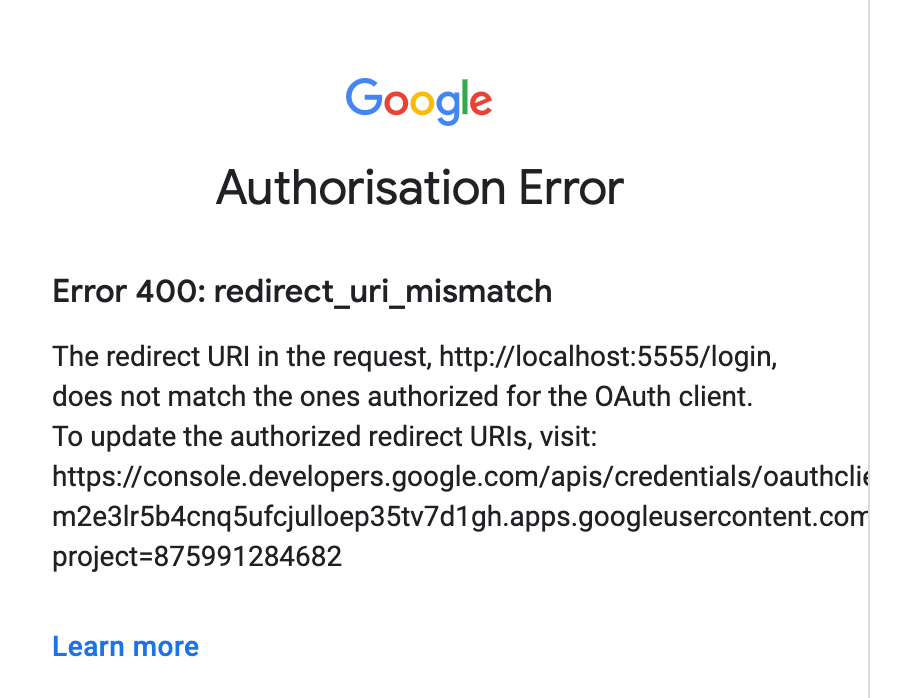
我选择的端口是 http://localhost:5555,你只要保证 local app 的端口和这里的端口一致即可,后面也可以修改的~
注意 authorised redirect url 那边要加入 http://localhost:5555 和 http://localhost:5555/login 这两个 url,否则你后面会遇到报错~

10. 成功拿到 Client ID!
3. Nuxt App
Google 那边搞定了之后,我们开始看 Nuxt 的部分。
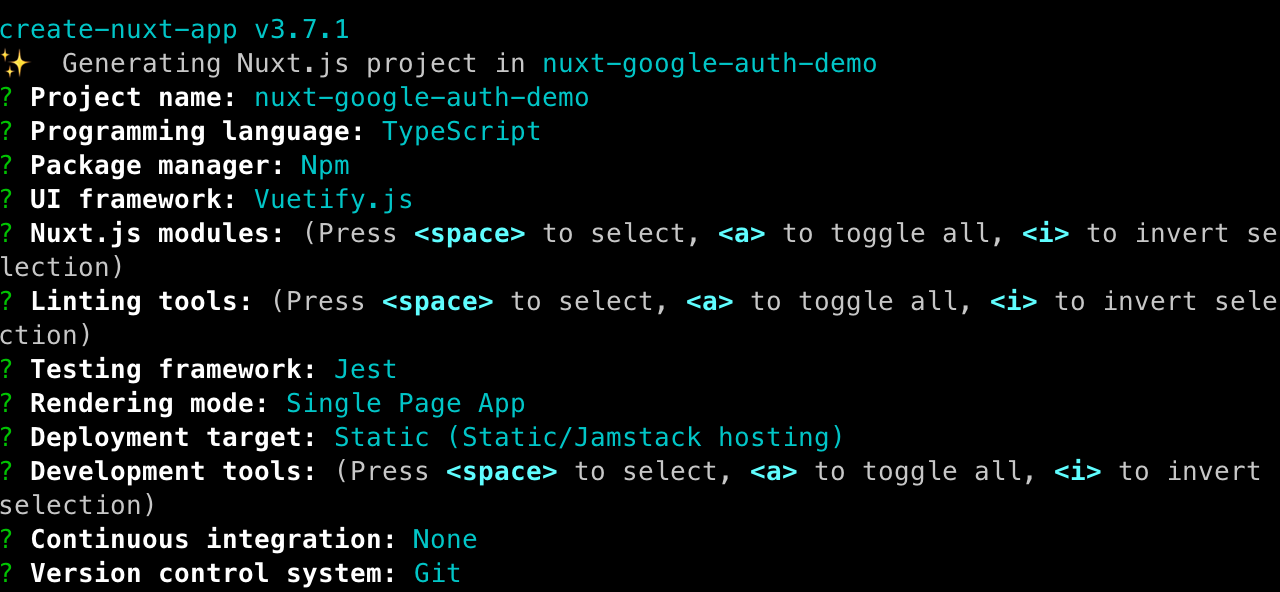
1. Create Nuxt App
根据你的需要来替换 nuxt-google-auth-demo 这个部分。
yarn create nuxt-app nuxt-google-auth-demo
在创建 Nuxt App 的过程中,你需要回答一系列的问题,我是这么选的:
- 这里比较关键的是 Programming Language,TypeScript 会有一些坑,但是我还是建议大家用 TS。
- 其他选项应该不影响我们的 demo app
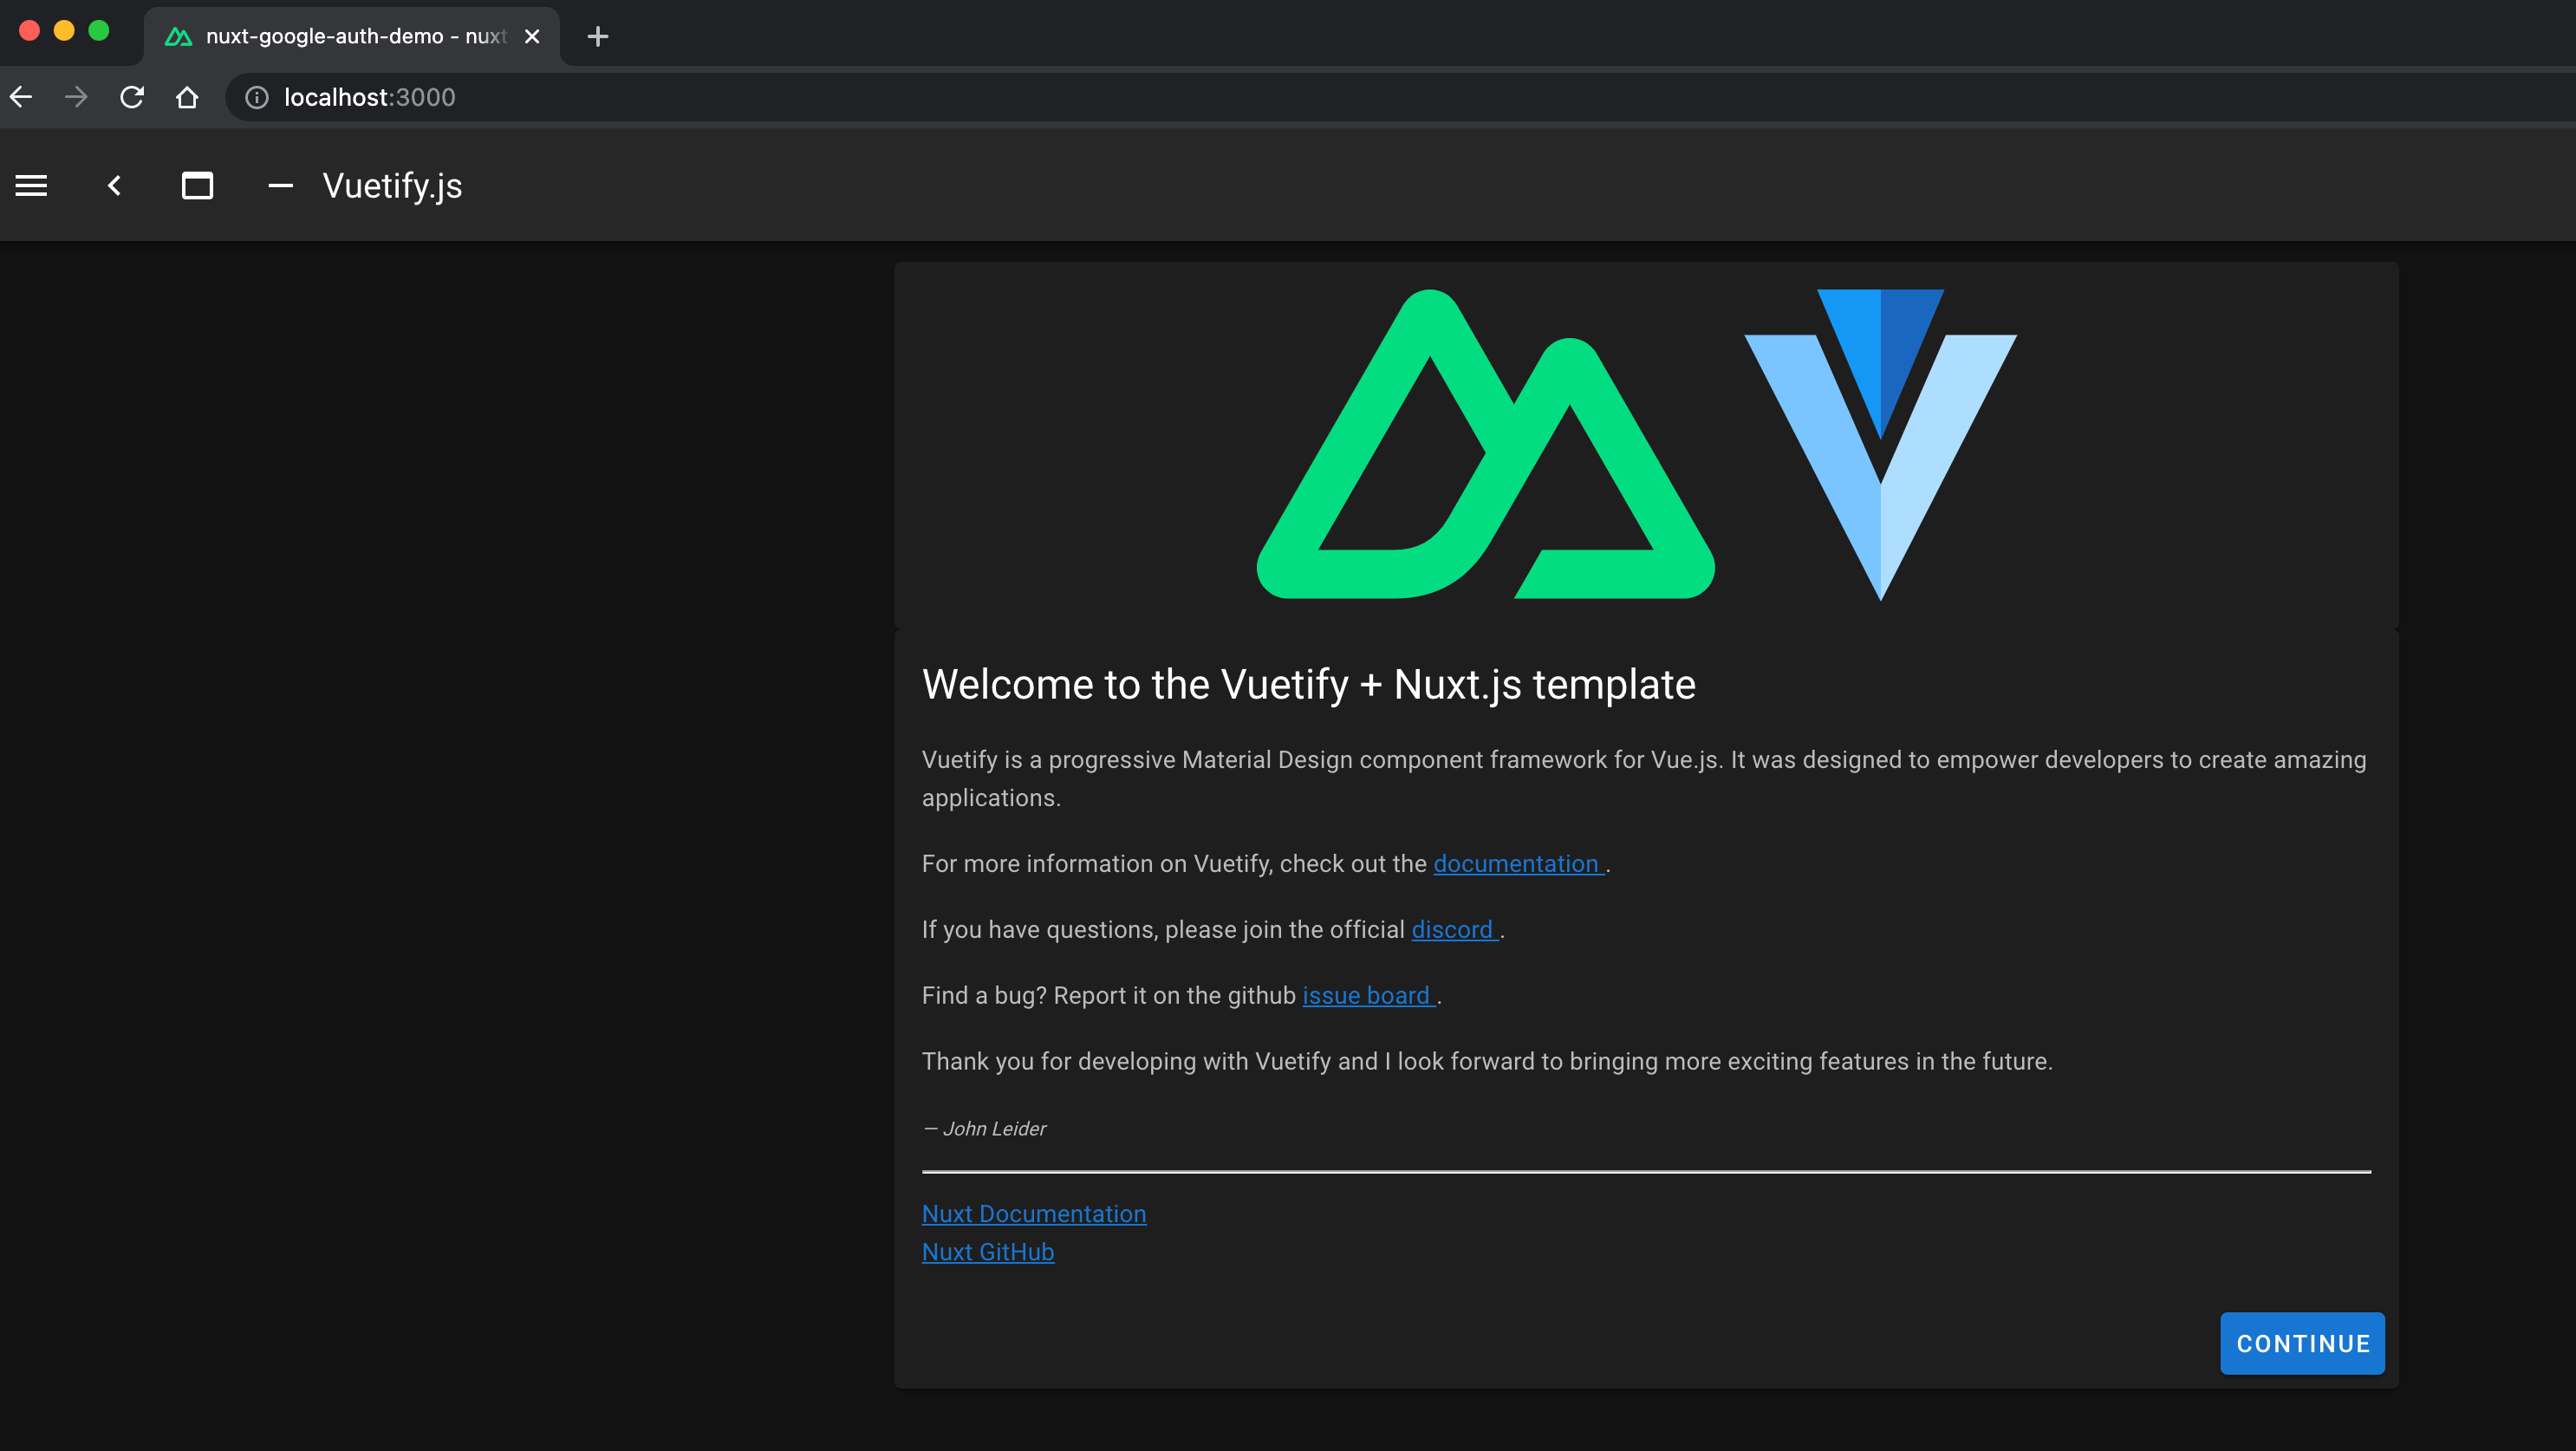
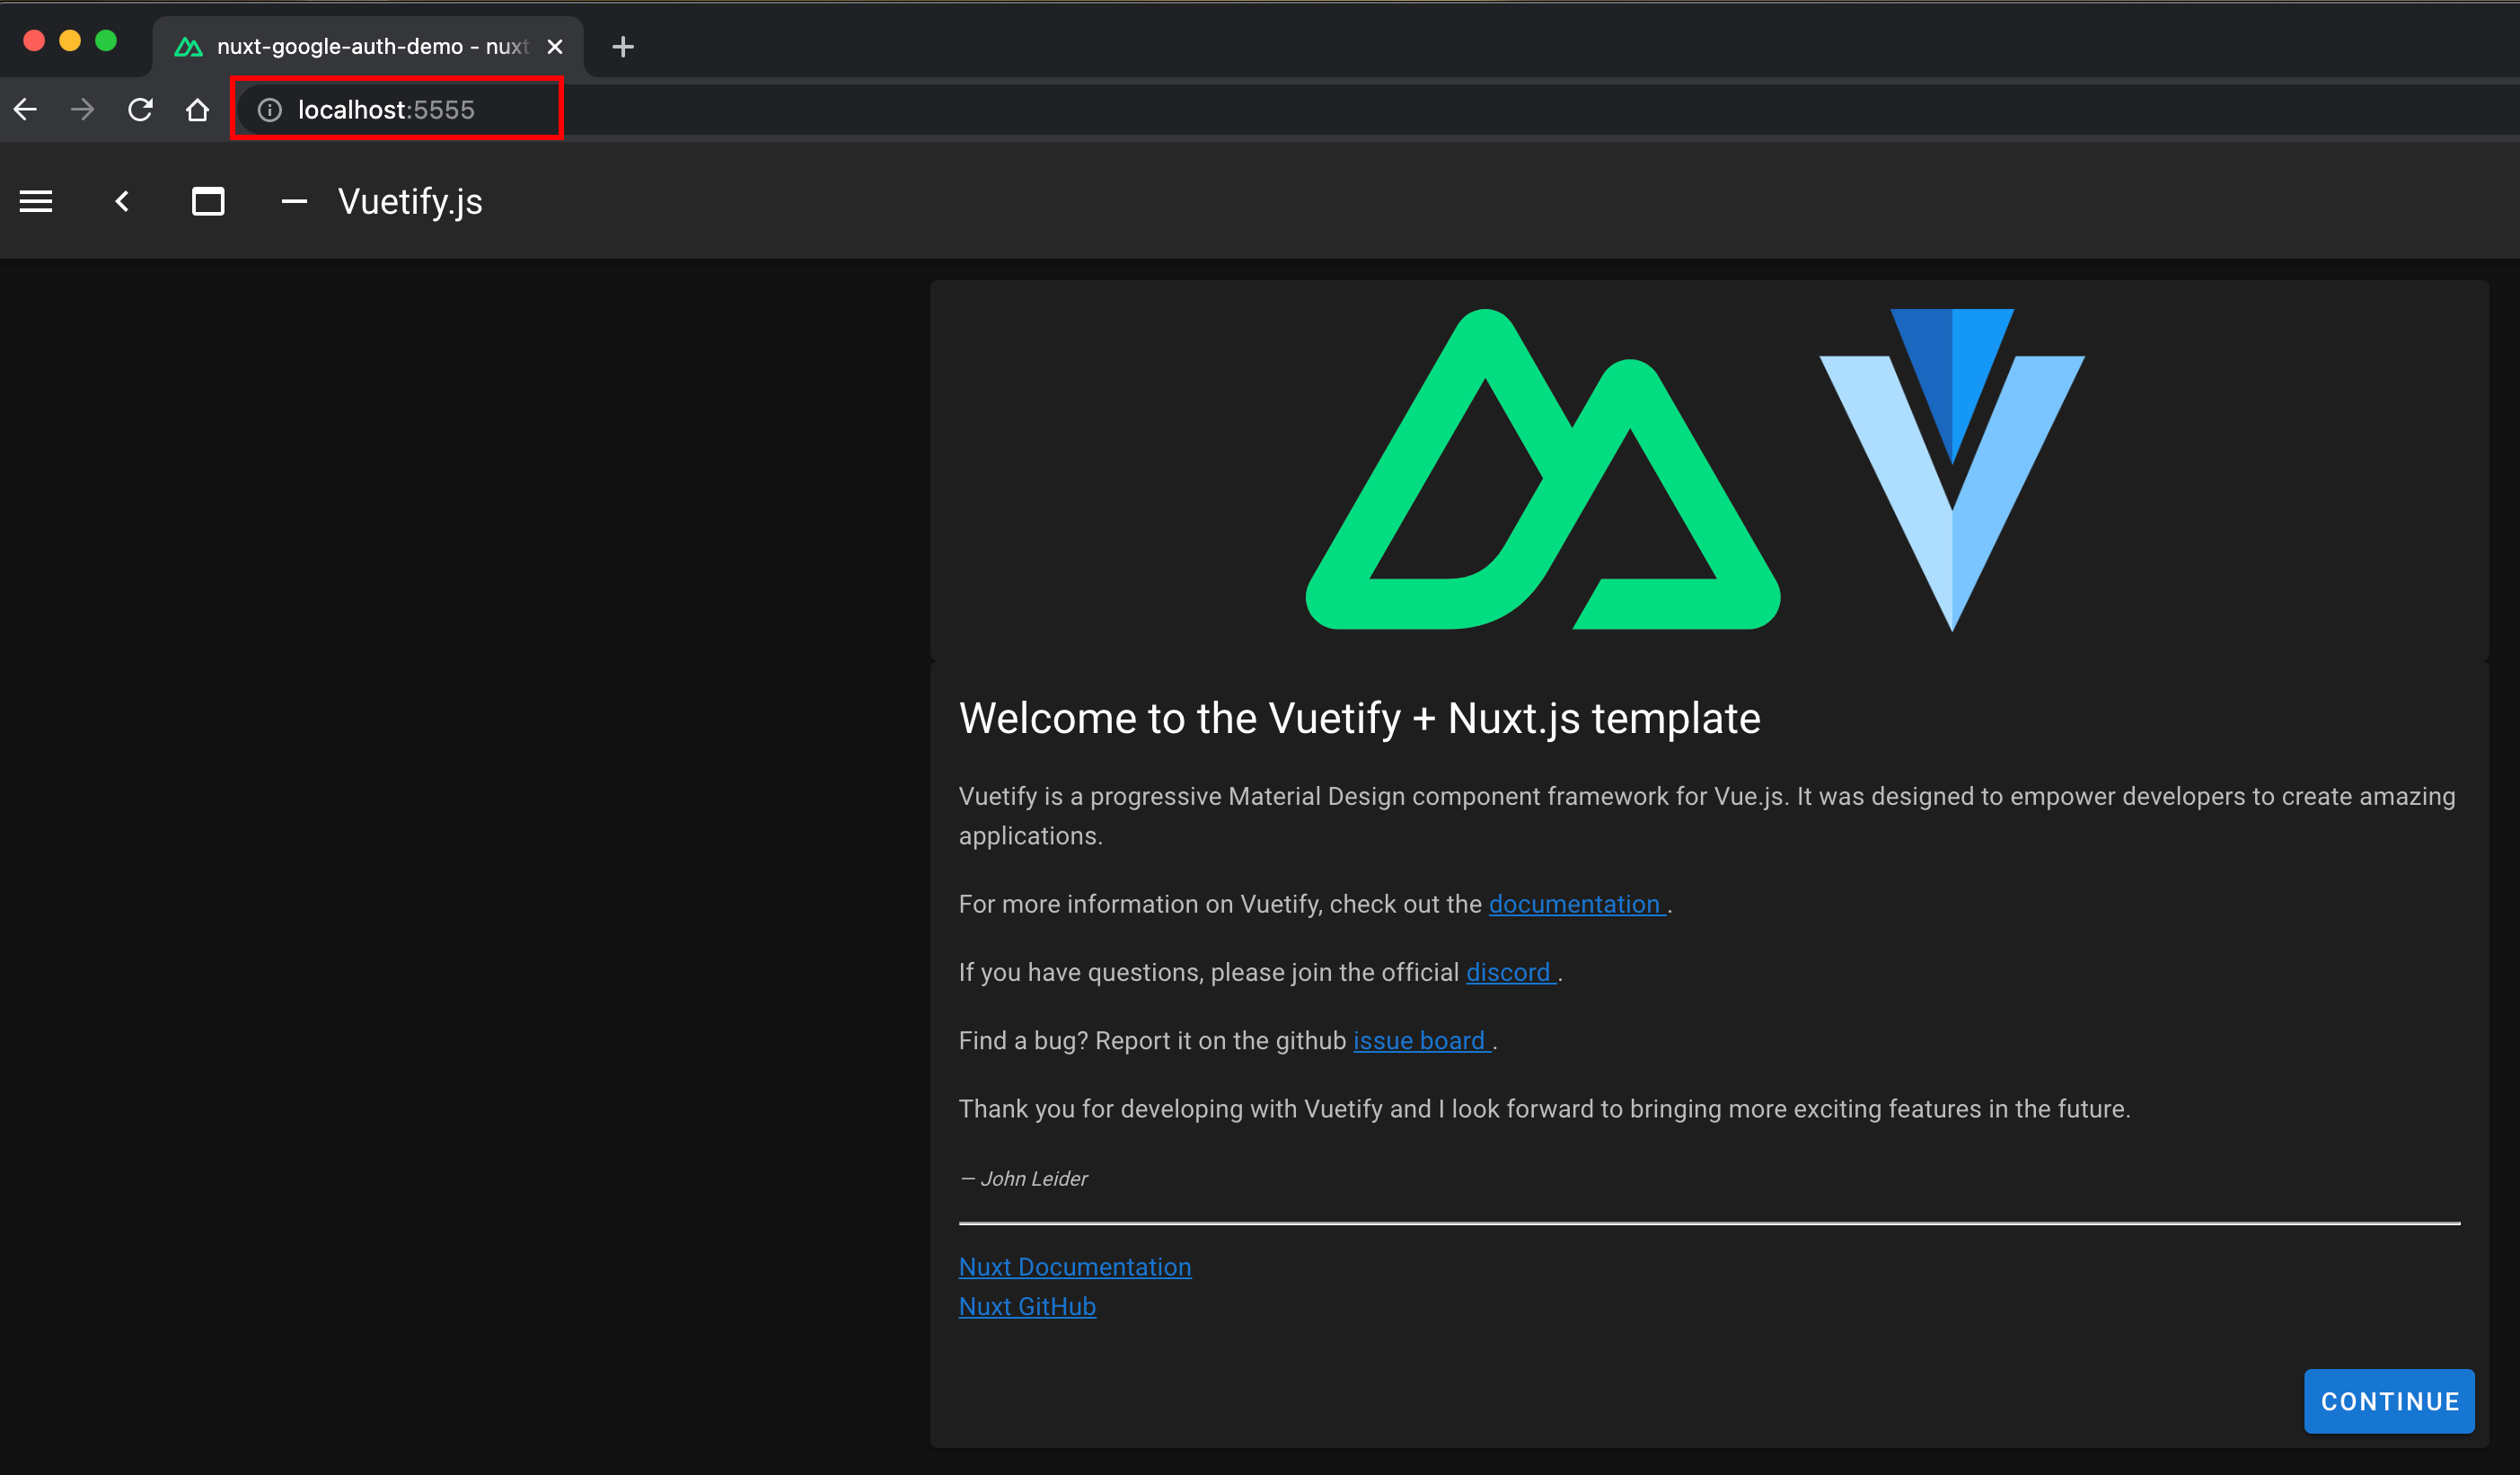
2. 运行 App,先跑一下试试
cd nuxt-google-auth-demo
npm run dev
3. 安装一些 auth 相关的 package
现在你可以用另一个 terminal tab 来进行安装,也可以关掉正在运行的 app。
我们需要一个叫做 nuxt auth 的 package,它可以帮助我们用最简单的方式来 integrate google auth 以及其他各种各样的 auth。
开始安装~(跟着官网教程来)
npm install --save-exact @nuxtjs/auth-next
npm install @nuxtjs/axios
装好之后改一下 nuxt.config.js,在 modules 里面加入这两个 package:
{
  "modules": ["@nuxtjs/axios", "@nuxtjs/auth-next"]
}
注意,如果你用的是 TypeScript,千万千万要把 tsconfig.json 也改了。
"types": [
      "@nuxtjs/axios",
      "@nuxtjs/auth-next"
    ]
4. 改端口 (optional)
好了,下面我们再把端口改一下(假如你在 google console 那边设置的端口和 app 运行的端口不同的话)。
在 nuxt.config.js 里面加入 server port 即可。
 export default {
   server:{
      port: 5555
    },
  ...
  }
现在再 run 一下,看看端口是否改了~
npm run dev
5. 配置 google auth strategy
再次回到 nuxt.config.js,现在我们要加入之前创建的那个 google client id 了~
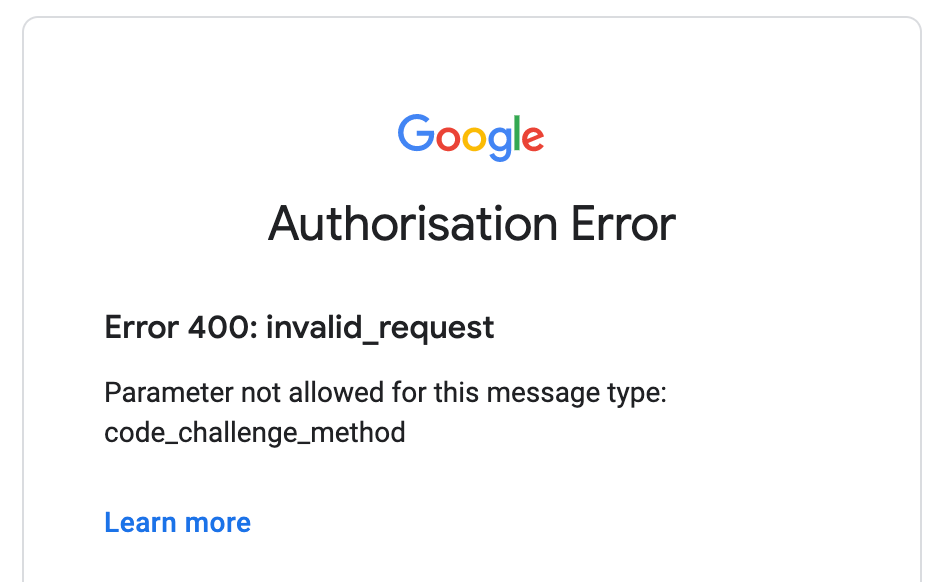
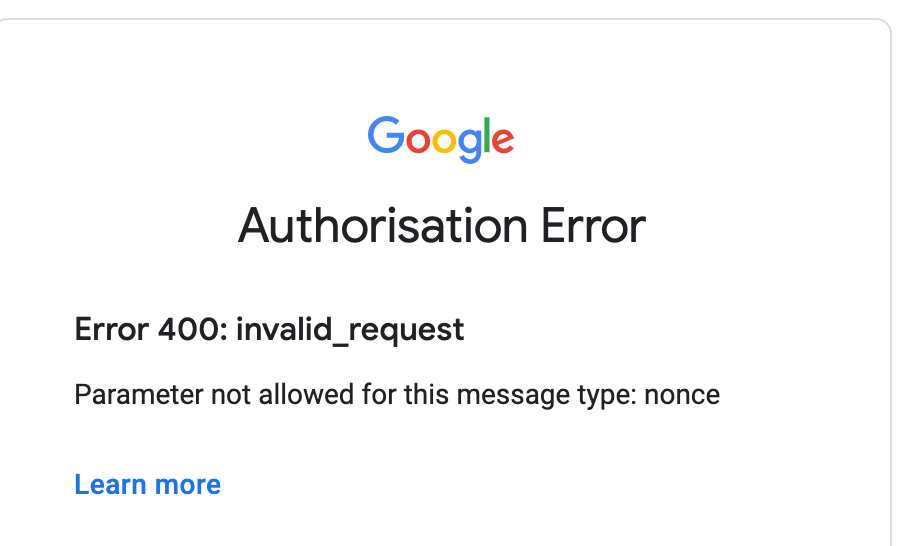
注意:codeChallengeMethod 和 responseType 一定要这样配置,不然你会看到各种 400 error。
  auth: {
    strategies: {
      google: {
        clientId: 'xxxxx.apps.googleusercontent.com',
        codeChallengeMethod: "",
        responseType: 'token id_token',
      }
    }
  },
6. 删掉一些没必要的文件
我最后就留了一个 index.vue 的页面。
然后我把 index.vue 的页面内容删掉,替换成下面这个简单的按钮。
<template>
  <div style="margin: 100px;">
    <div v-if="$auth.loggedIn">
      {{ $auth.user.email }}
      <v-btn @click="$auth.logout()">Logout</v-btn>
    </div>
    <div v-else>
      <v-btn @click="login">Login</v-btn>
    </div>
  </div>
</template>

<script lang="ts">
  import Vue from "vue";
  export default Vue.extend({
    methods: {
      login() {
        this.$auth.loginWith("google");
      },
    },
  });
</script>
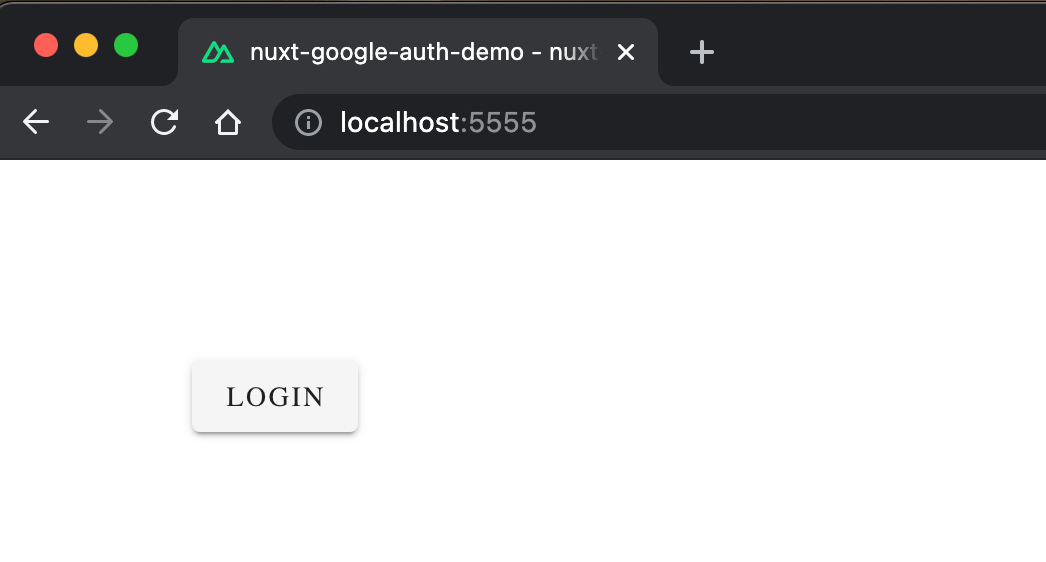
7. 大功告成~
此时,点 login 你应该会直接看到这个 sign in 界面~
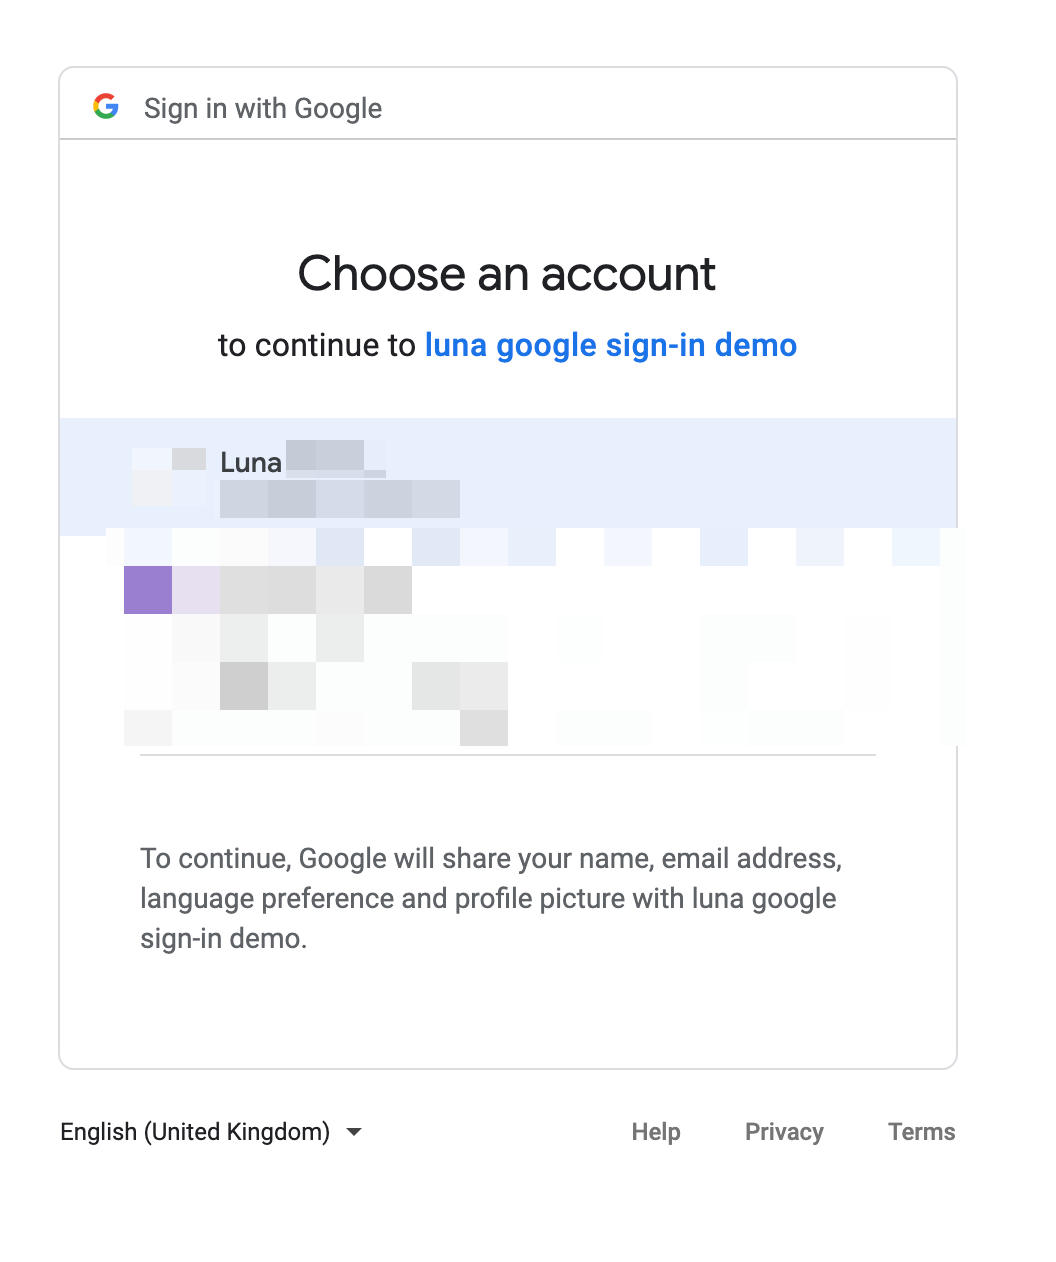
点击 login 之后你会看到你的邮箱显示出来,并且有 logout button。
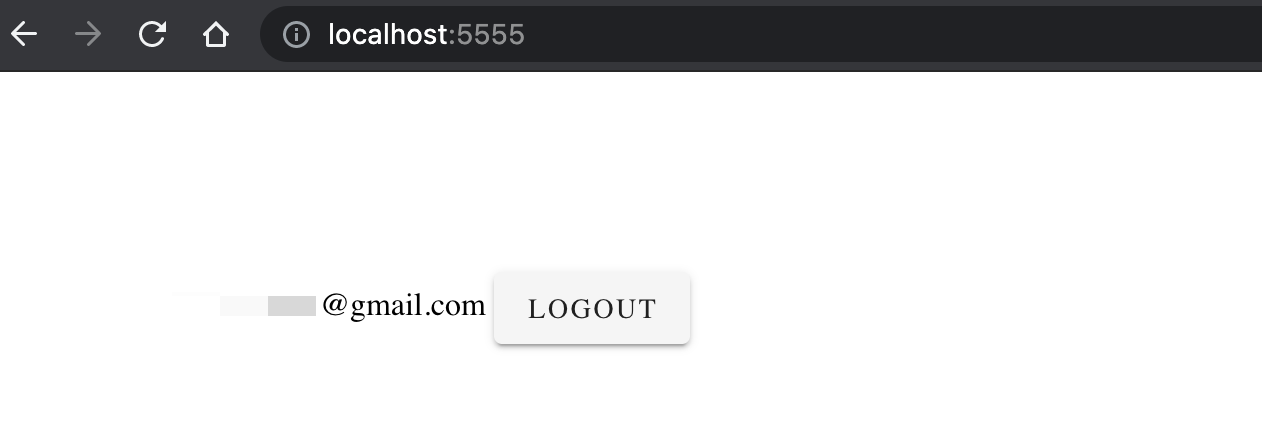
点 logout 再 refresh 页面就又回到了 login 界面。
4. 走过的弯路
1. $auth 无法识别
首先确保你在 nuxt config 和 ts config 里面都加了这两个 package,然后确保你在 index.vue 里面的代码先 import vue, 再 export default Vue.extend…
2. google 登录界面各种 400 error
首先确保你在 google console 里面的 authorised url 配置了两个 url,然后确保你在 nuxt config 的 auth strategy 那里一共加了 3 个 config。
3. user 无法 login
确保你的 gmail address 被加入到了 test user 里面(oAuth consent screen 那一步)。
4. 找不到 nuxt project 里面的 main.js
有很多教程都是通过修改 main.js 来实现 auth 的,但是 nuxt framework 里面没有 main.js,只能用 plugin 来实现类似的功能(然而我尝试了很多个方案都失败了)。
5. 用 nuxt auth package 是否需要 active store
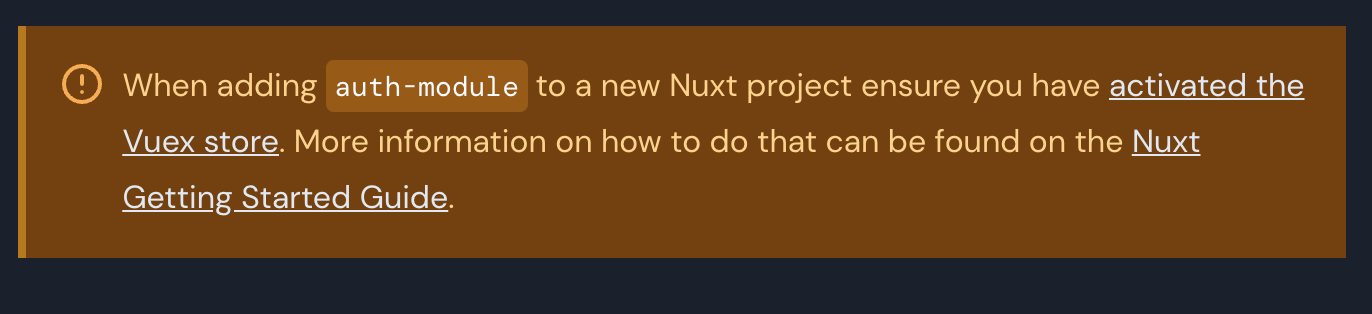
nuxt auth 官网的教程 有这个步骤,但是我亲测不需要,所以大家可以忽略这部分(可能以后做复杂的功能需要用到,但是 demo 这里不用)。
5. 结语
最后,本文参考了一个很不错的 tutorial 视频:https://www.youtube.com/watch?v=zzUpO8tXoaw,视频讲的是 local auth,更加复杂一些。
文中小 demo 的源码地址:lunawen/nuxt-google-auth-demo (github.com)